Torque Tube Connections
Here you can see the connections between the fuselage tube and the torque tube inside the wings. Via this connection the steering commands are transferred into the wings. As nearly …
Building our airplane
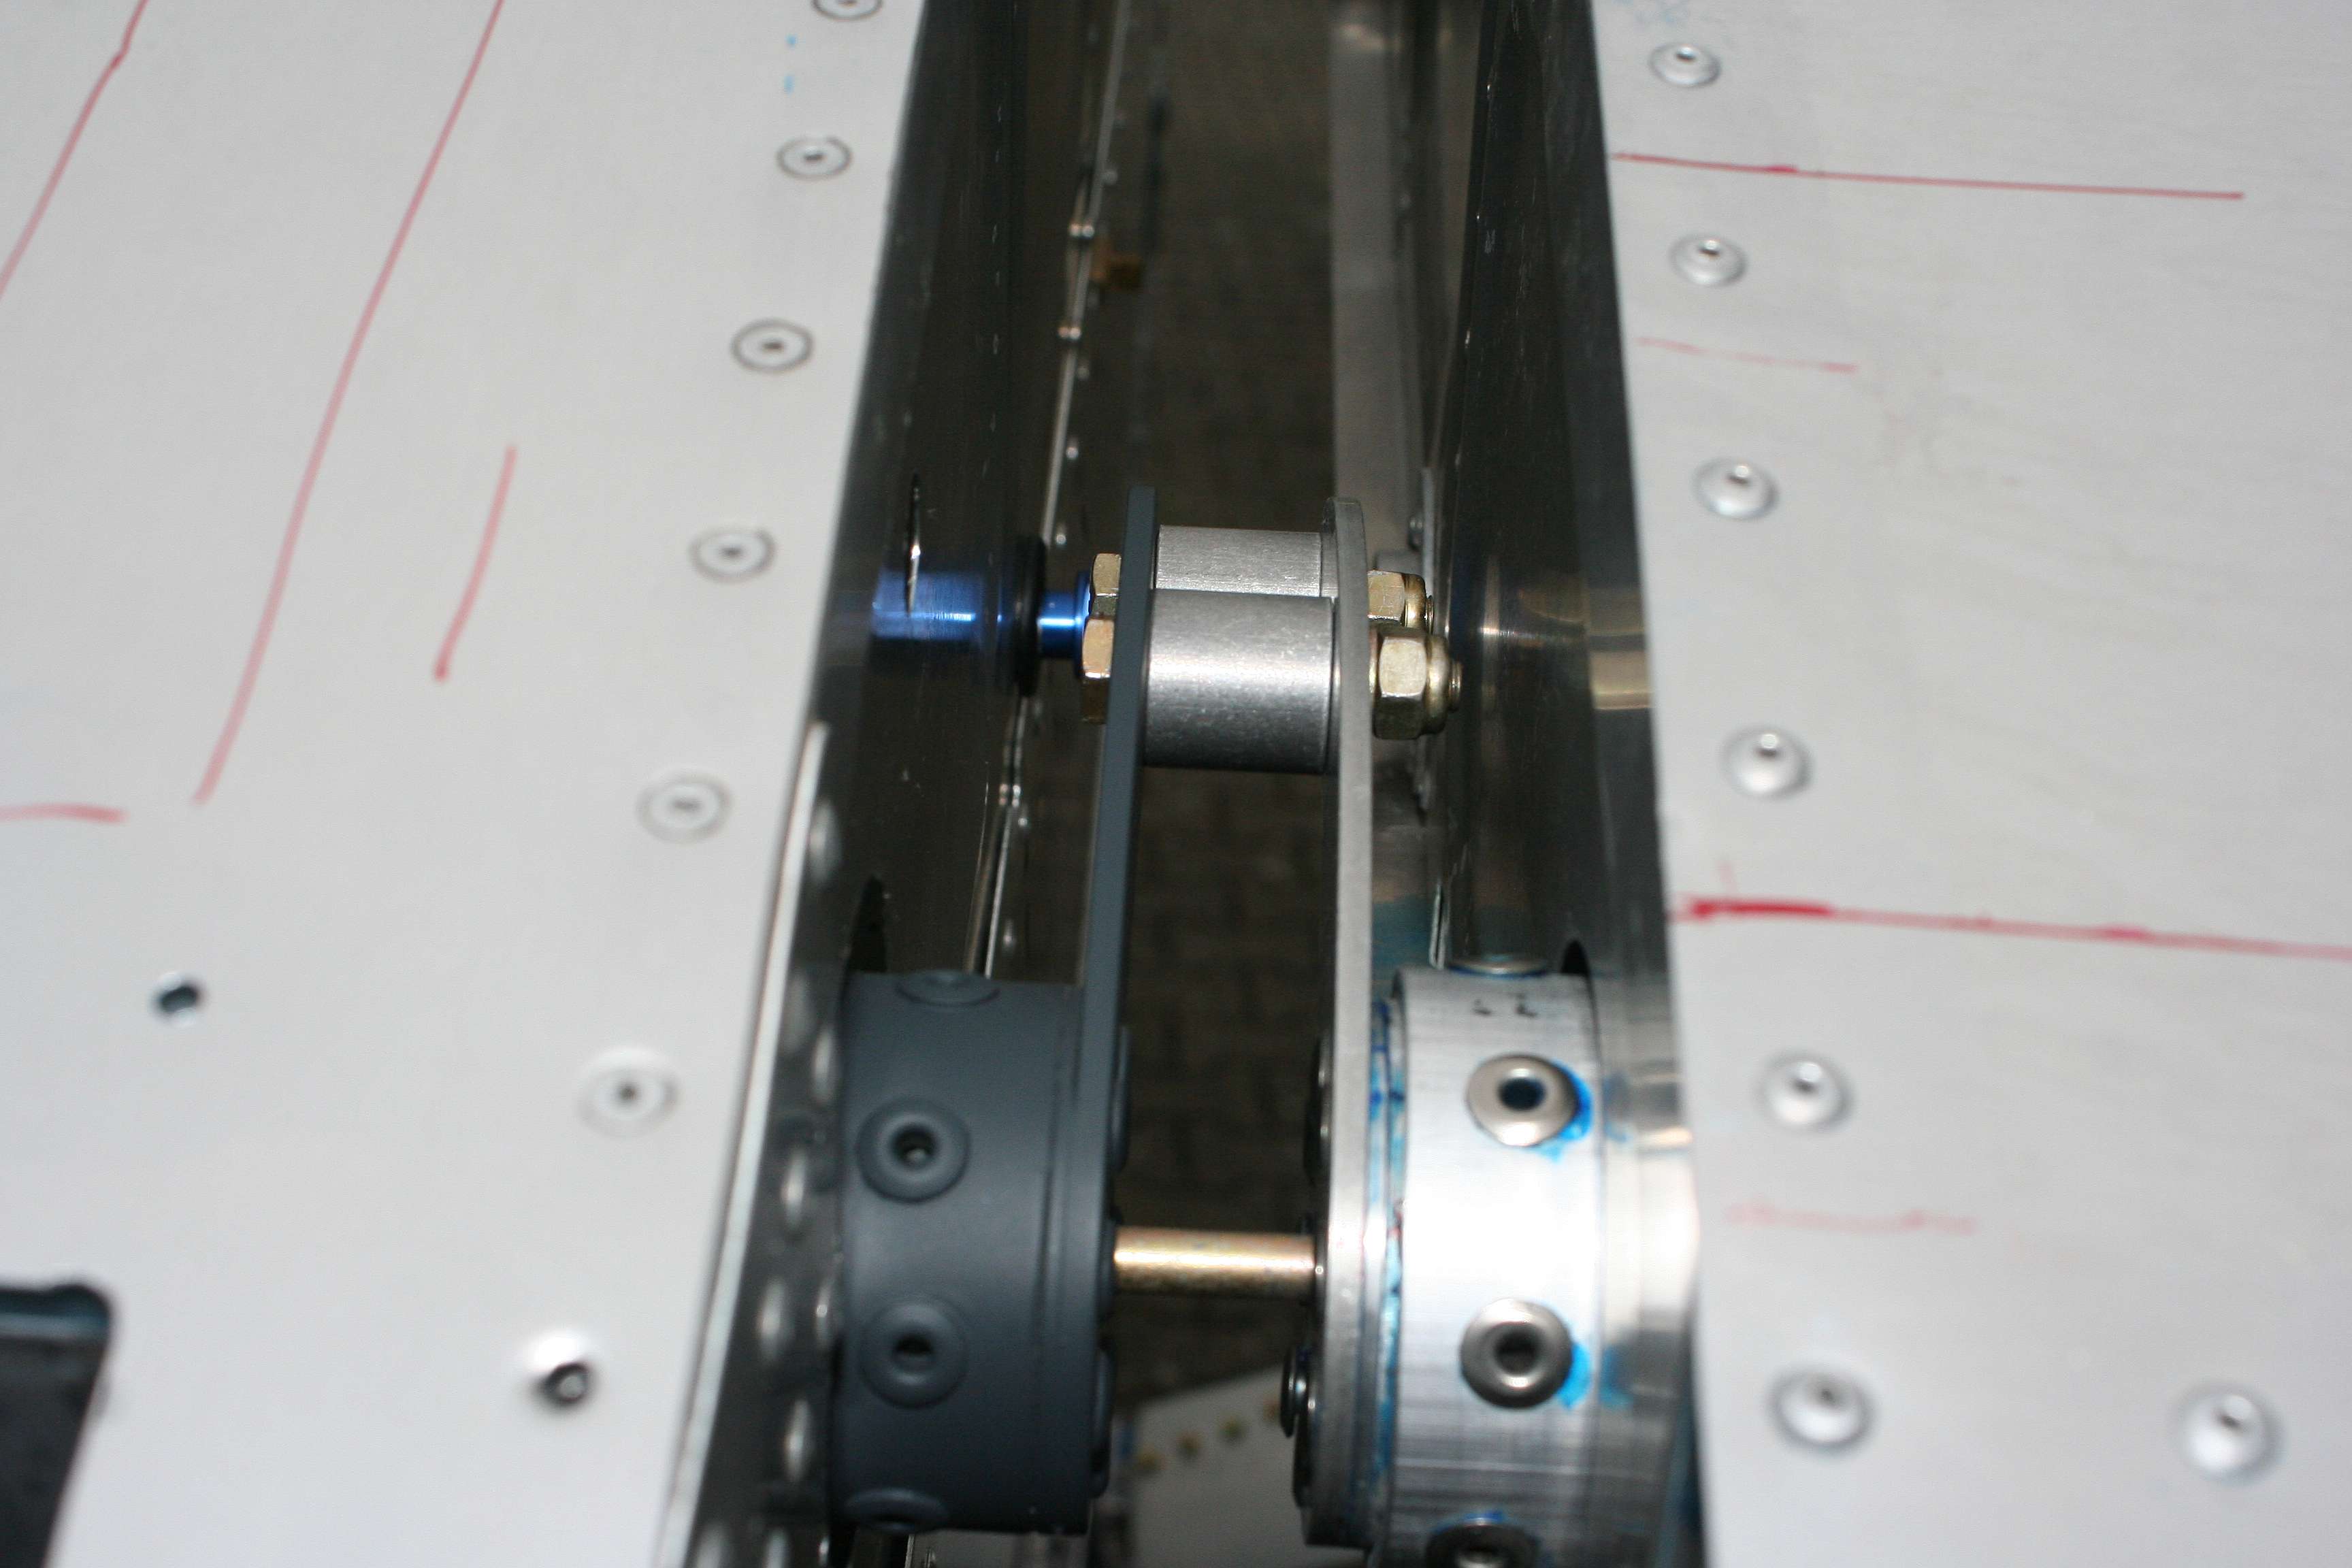
Here you can see the connections between the fuselage tube and the torque tube inside the wings. Via this connection the steering commands are transferred into the wings. As nearly …
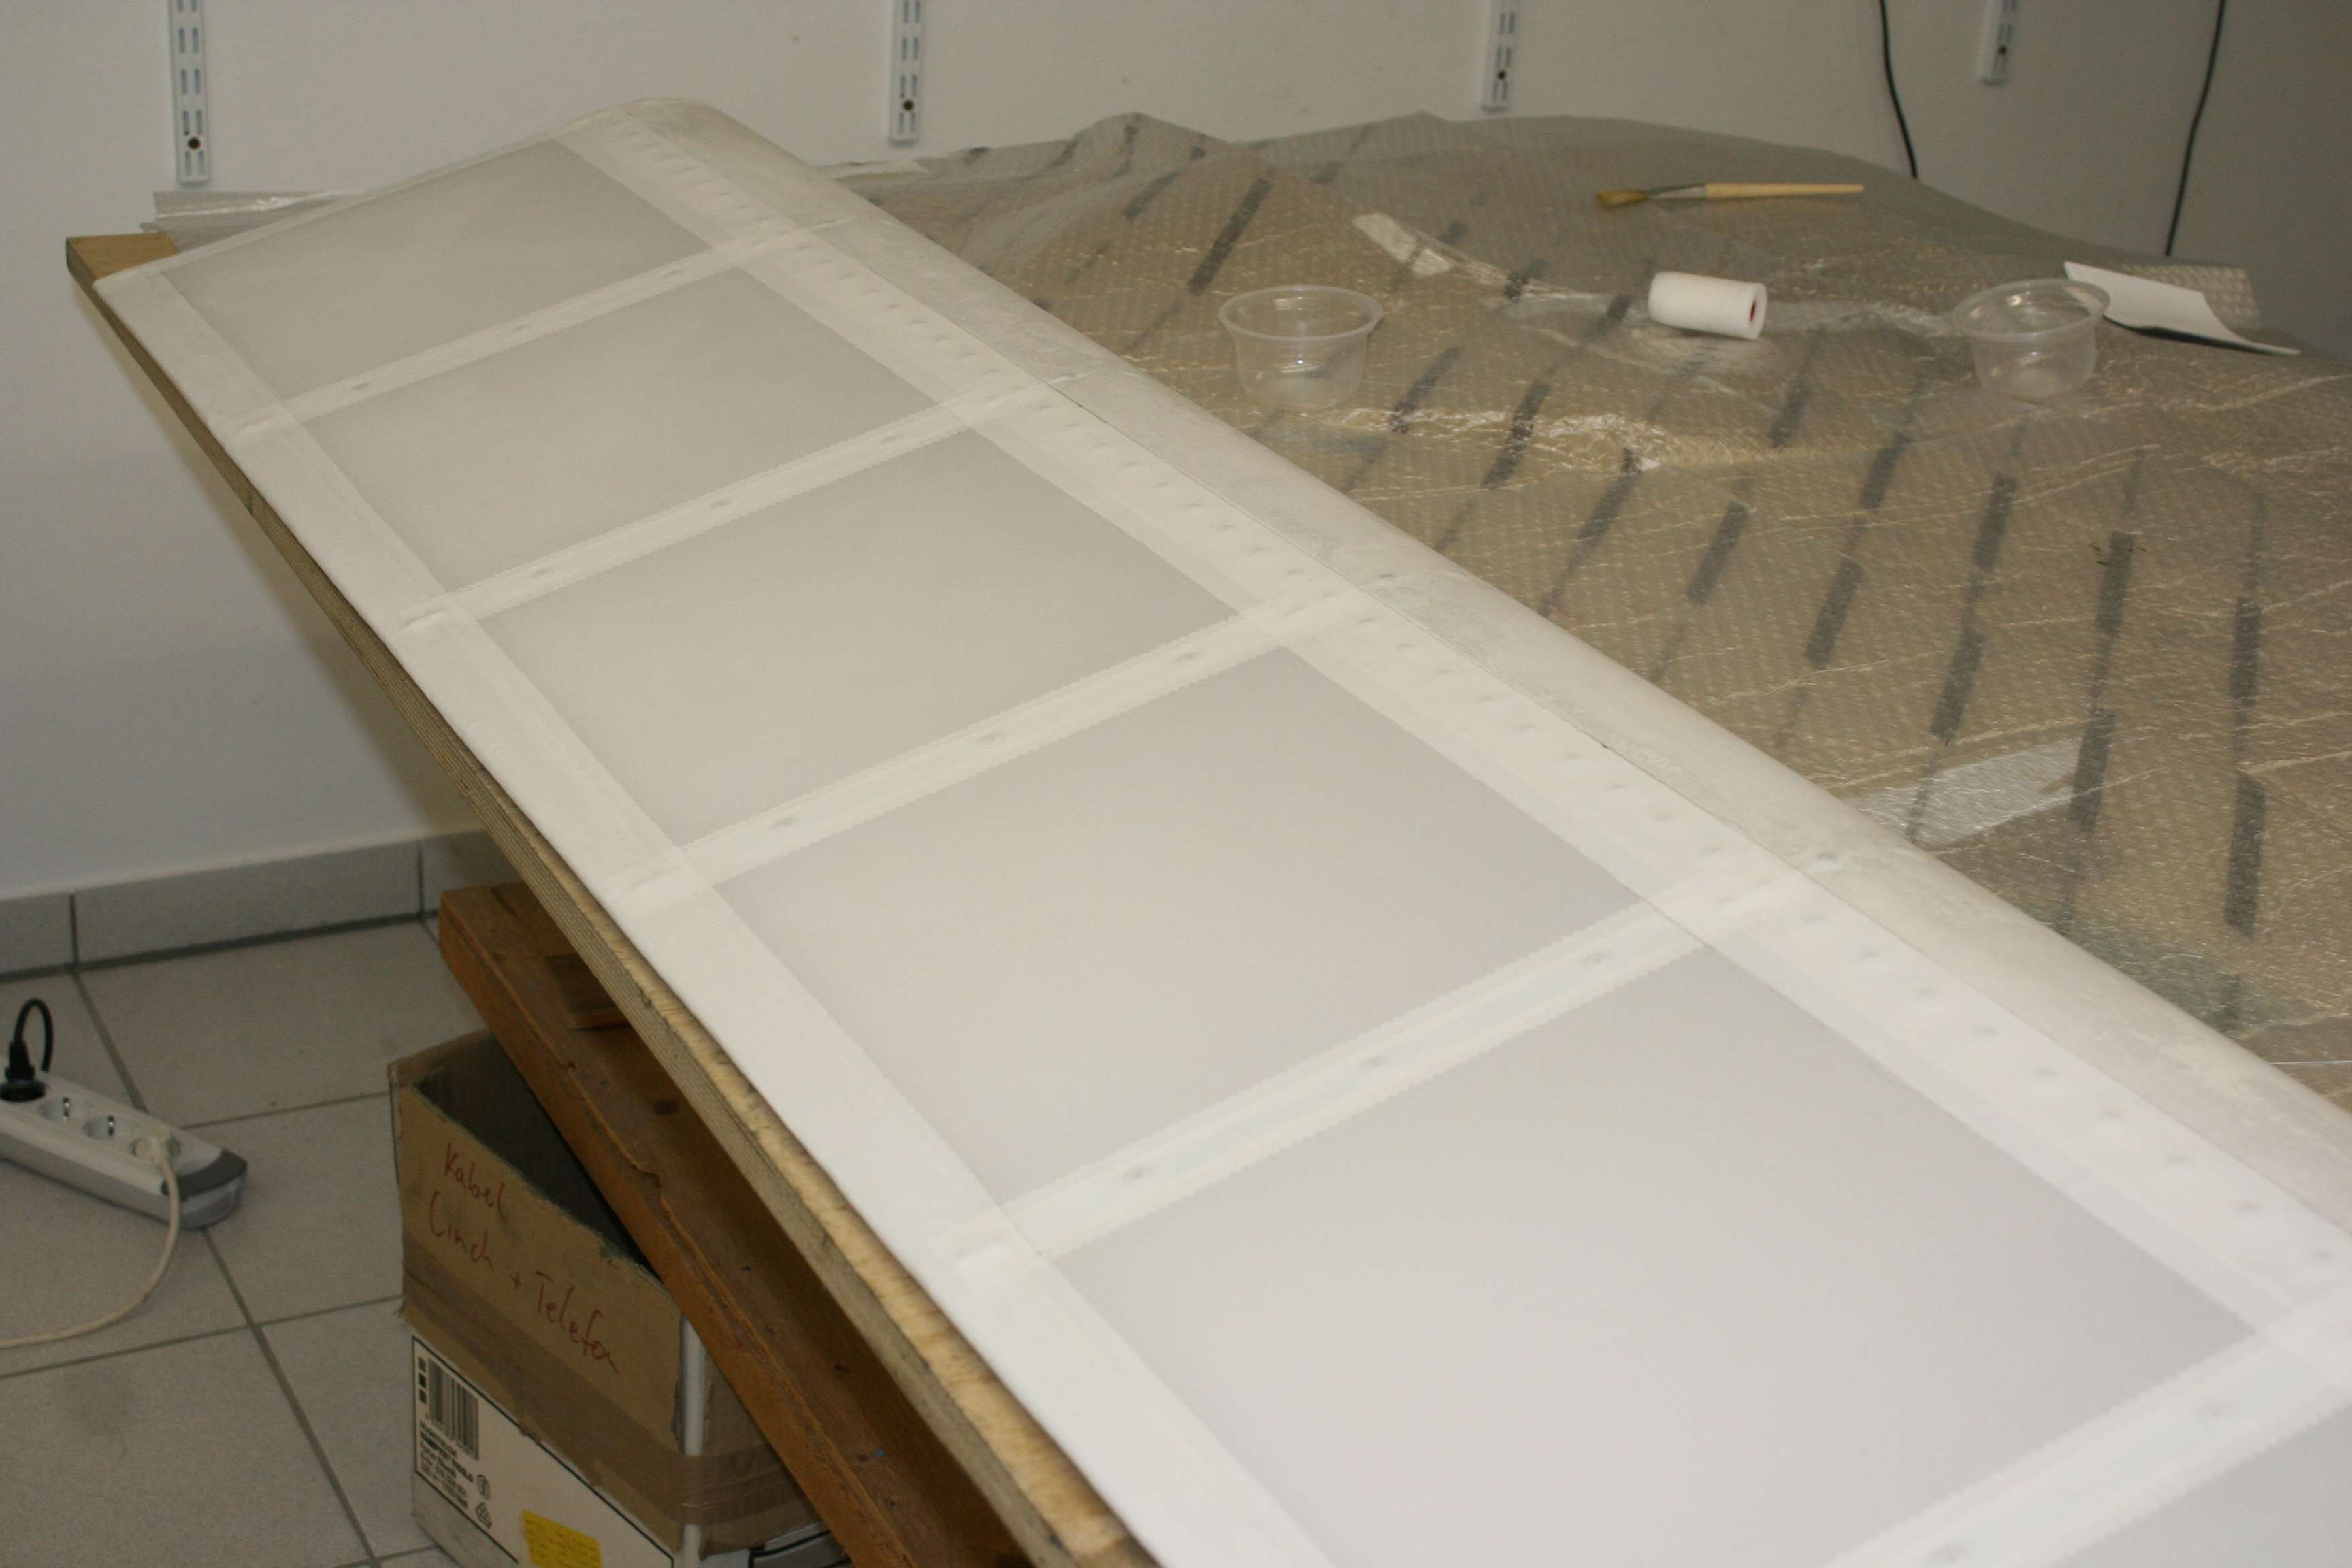
Although the ailerons were the first parts to build, I waited with the covering until now. So it is one of the final steps, but its time to do this. …
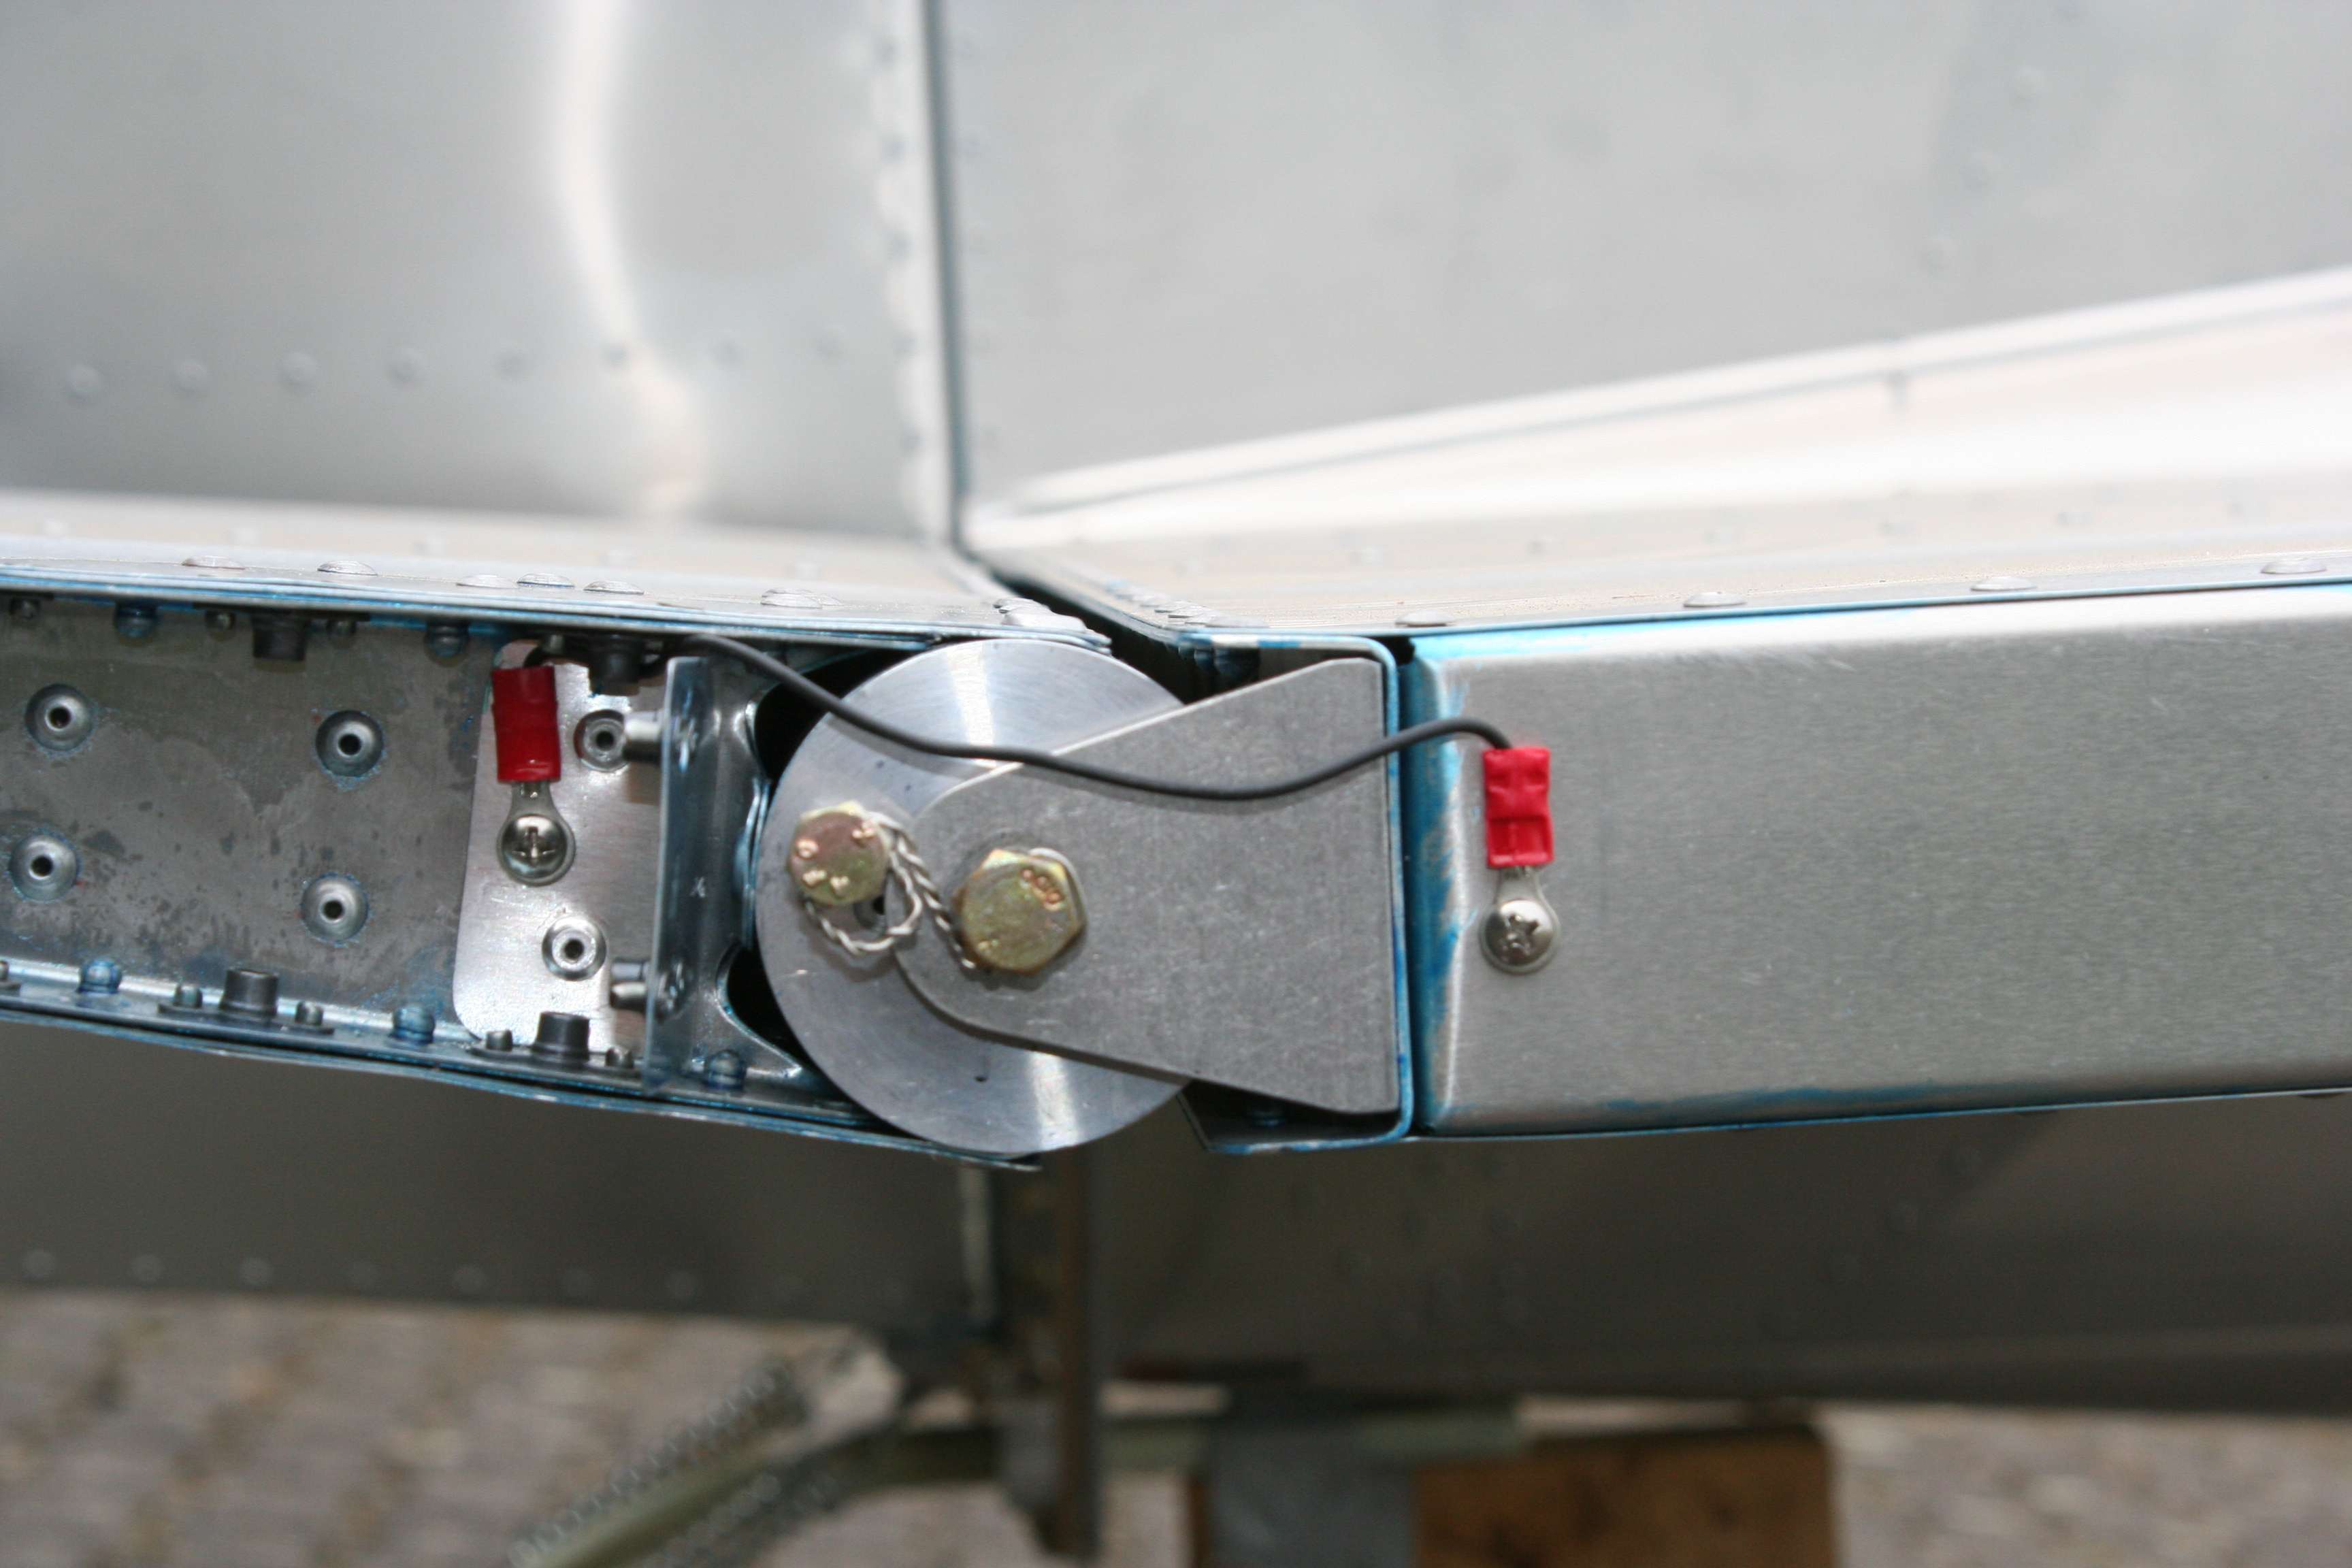
As requested by our german FAA (LBA) I had to electrically bond every moving part of the plane. This sounds rather superfluous in an all metail aircraft, but it’s probably …
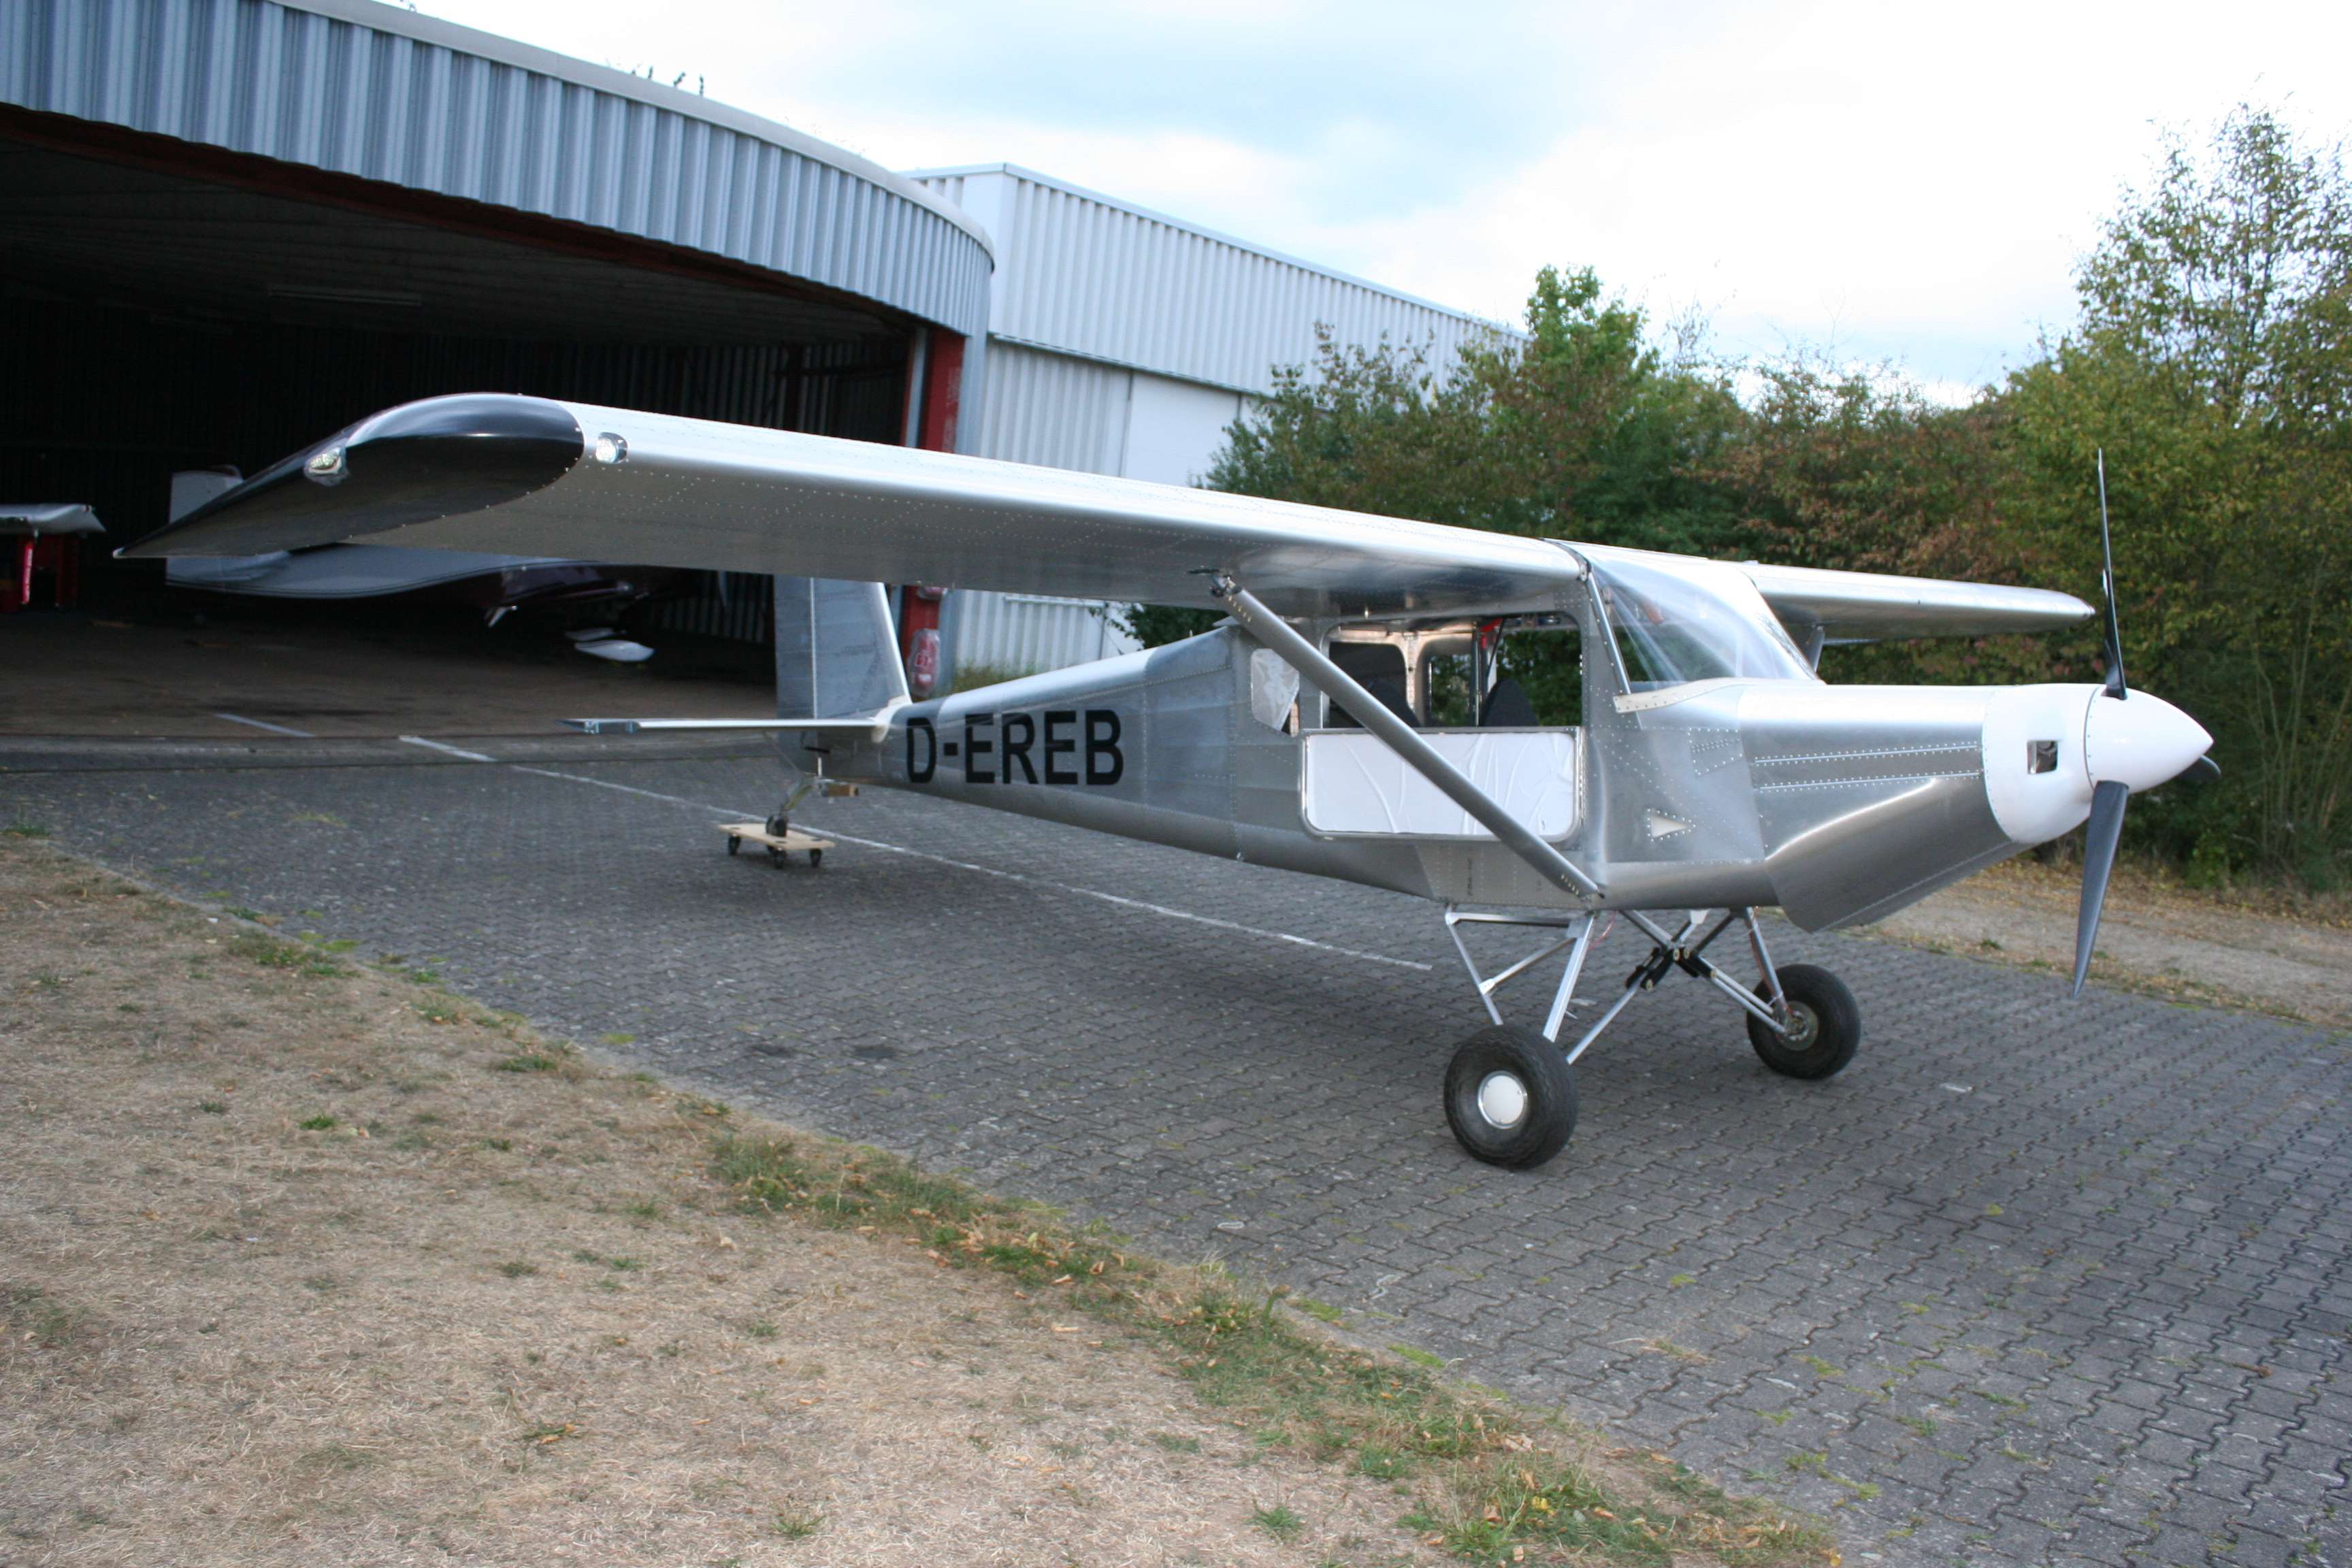
We reserved a registration number for the Rebel: D-EREB. We used a printed foil to put the numbers on the plane. The plane will be painted later, but to …
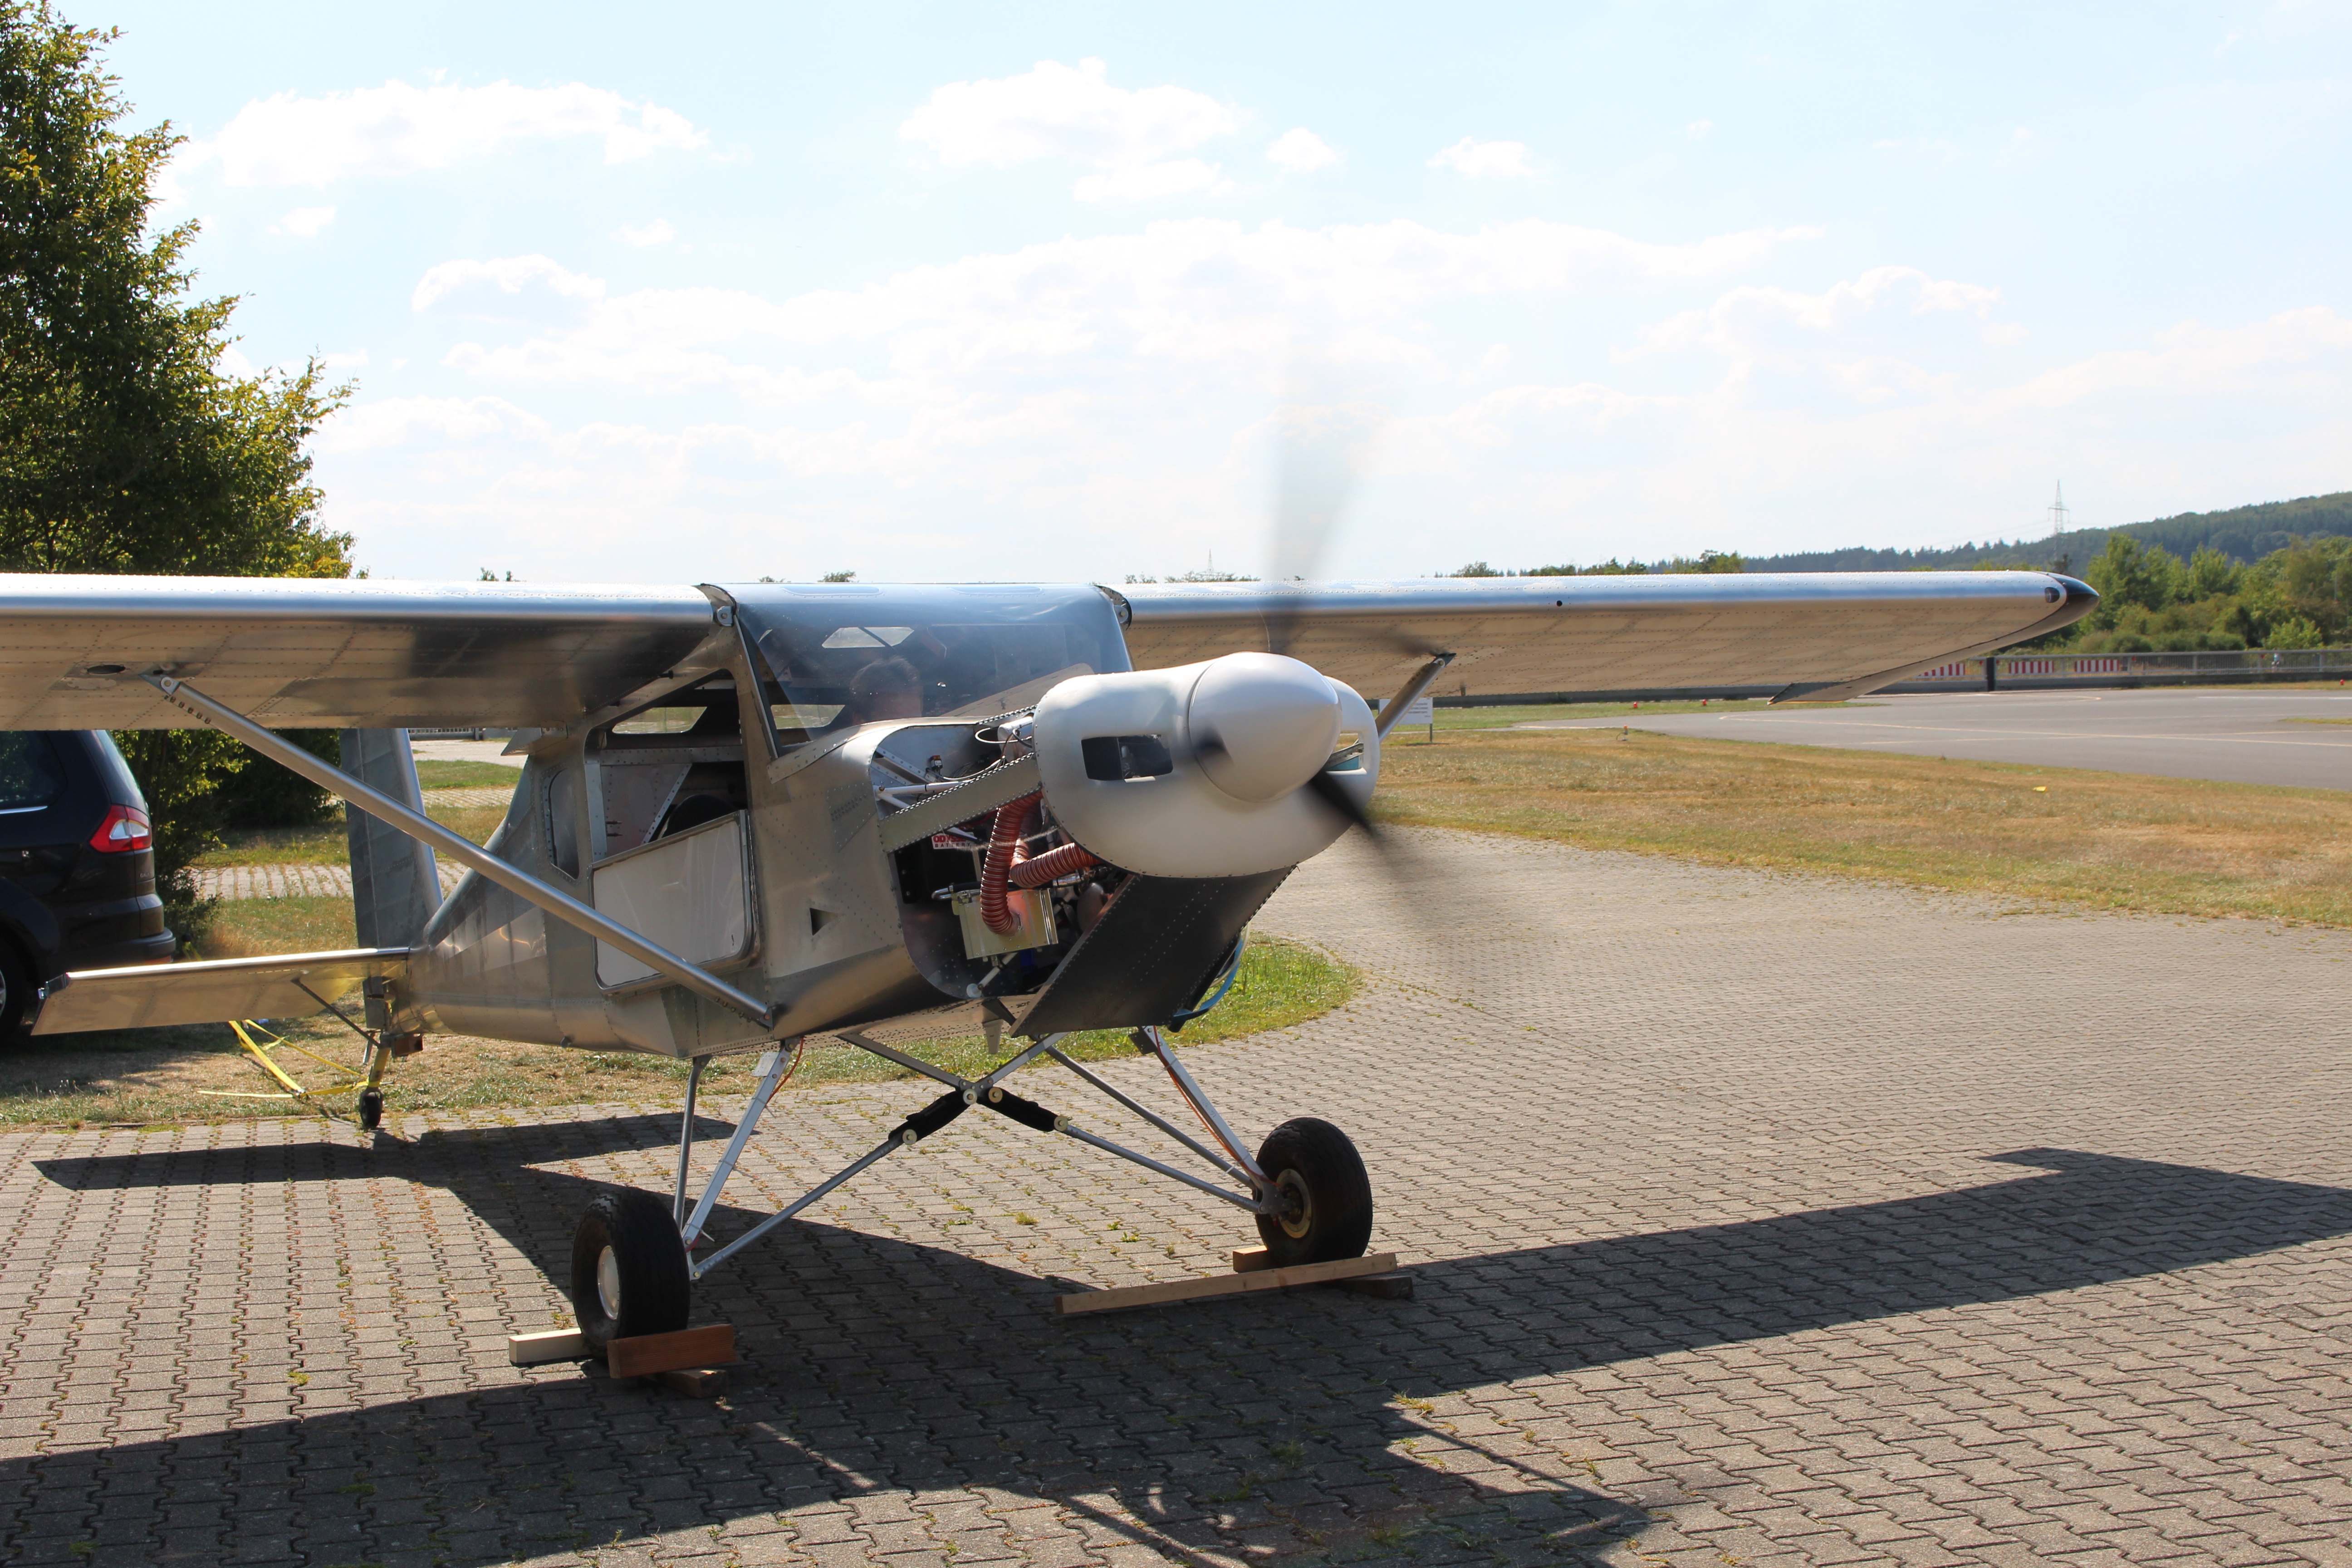
A great day today! The engine was started for the first time. It all went perfect. The engine started immediately. All engine values showed absolutely great values. Several security precautions …
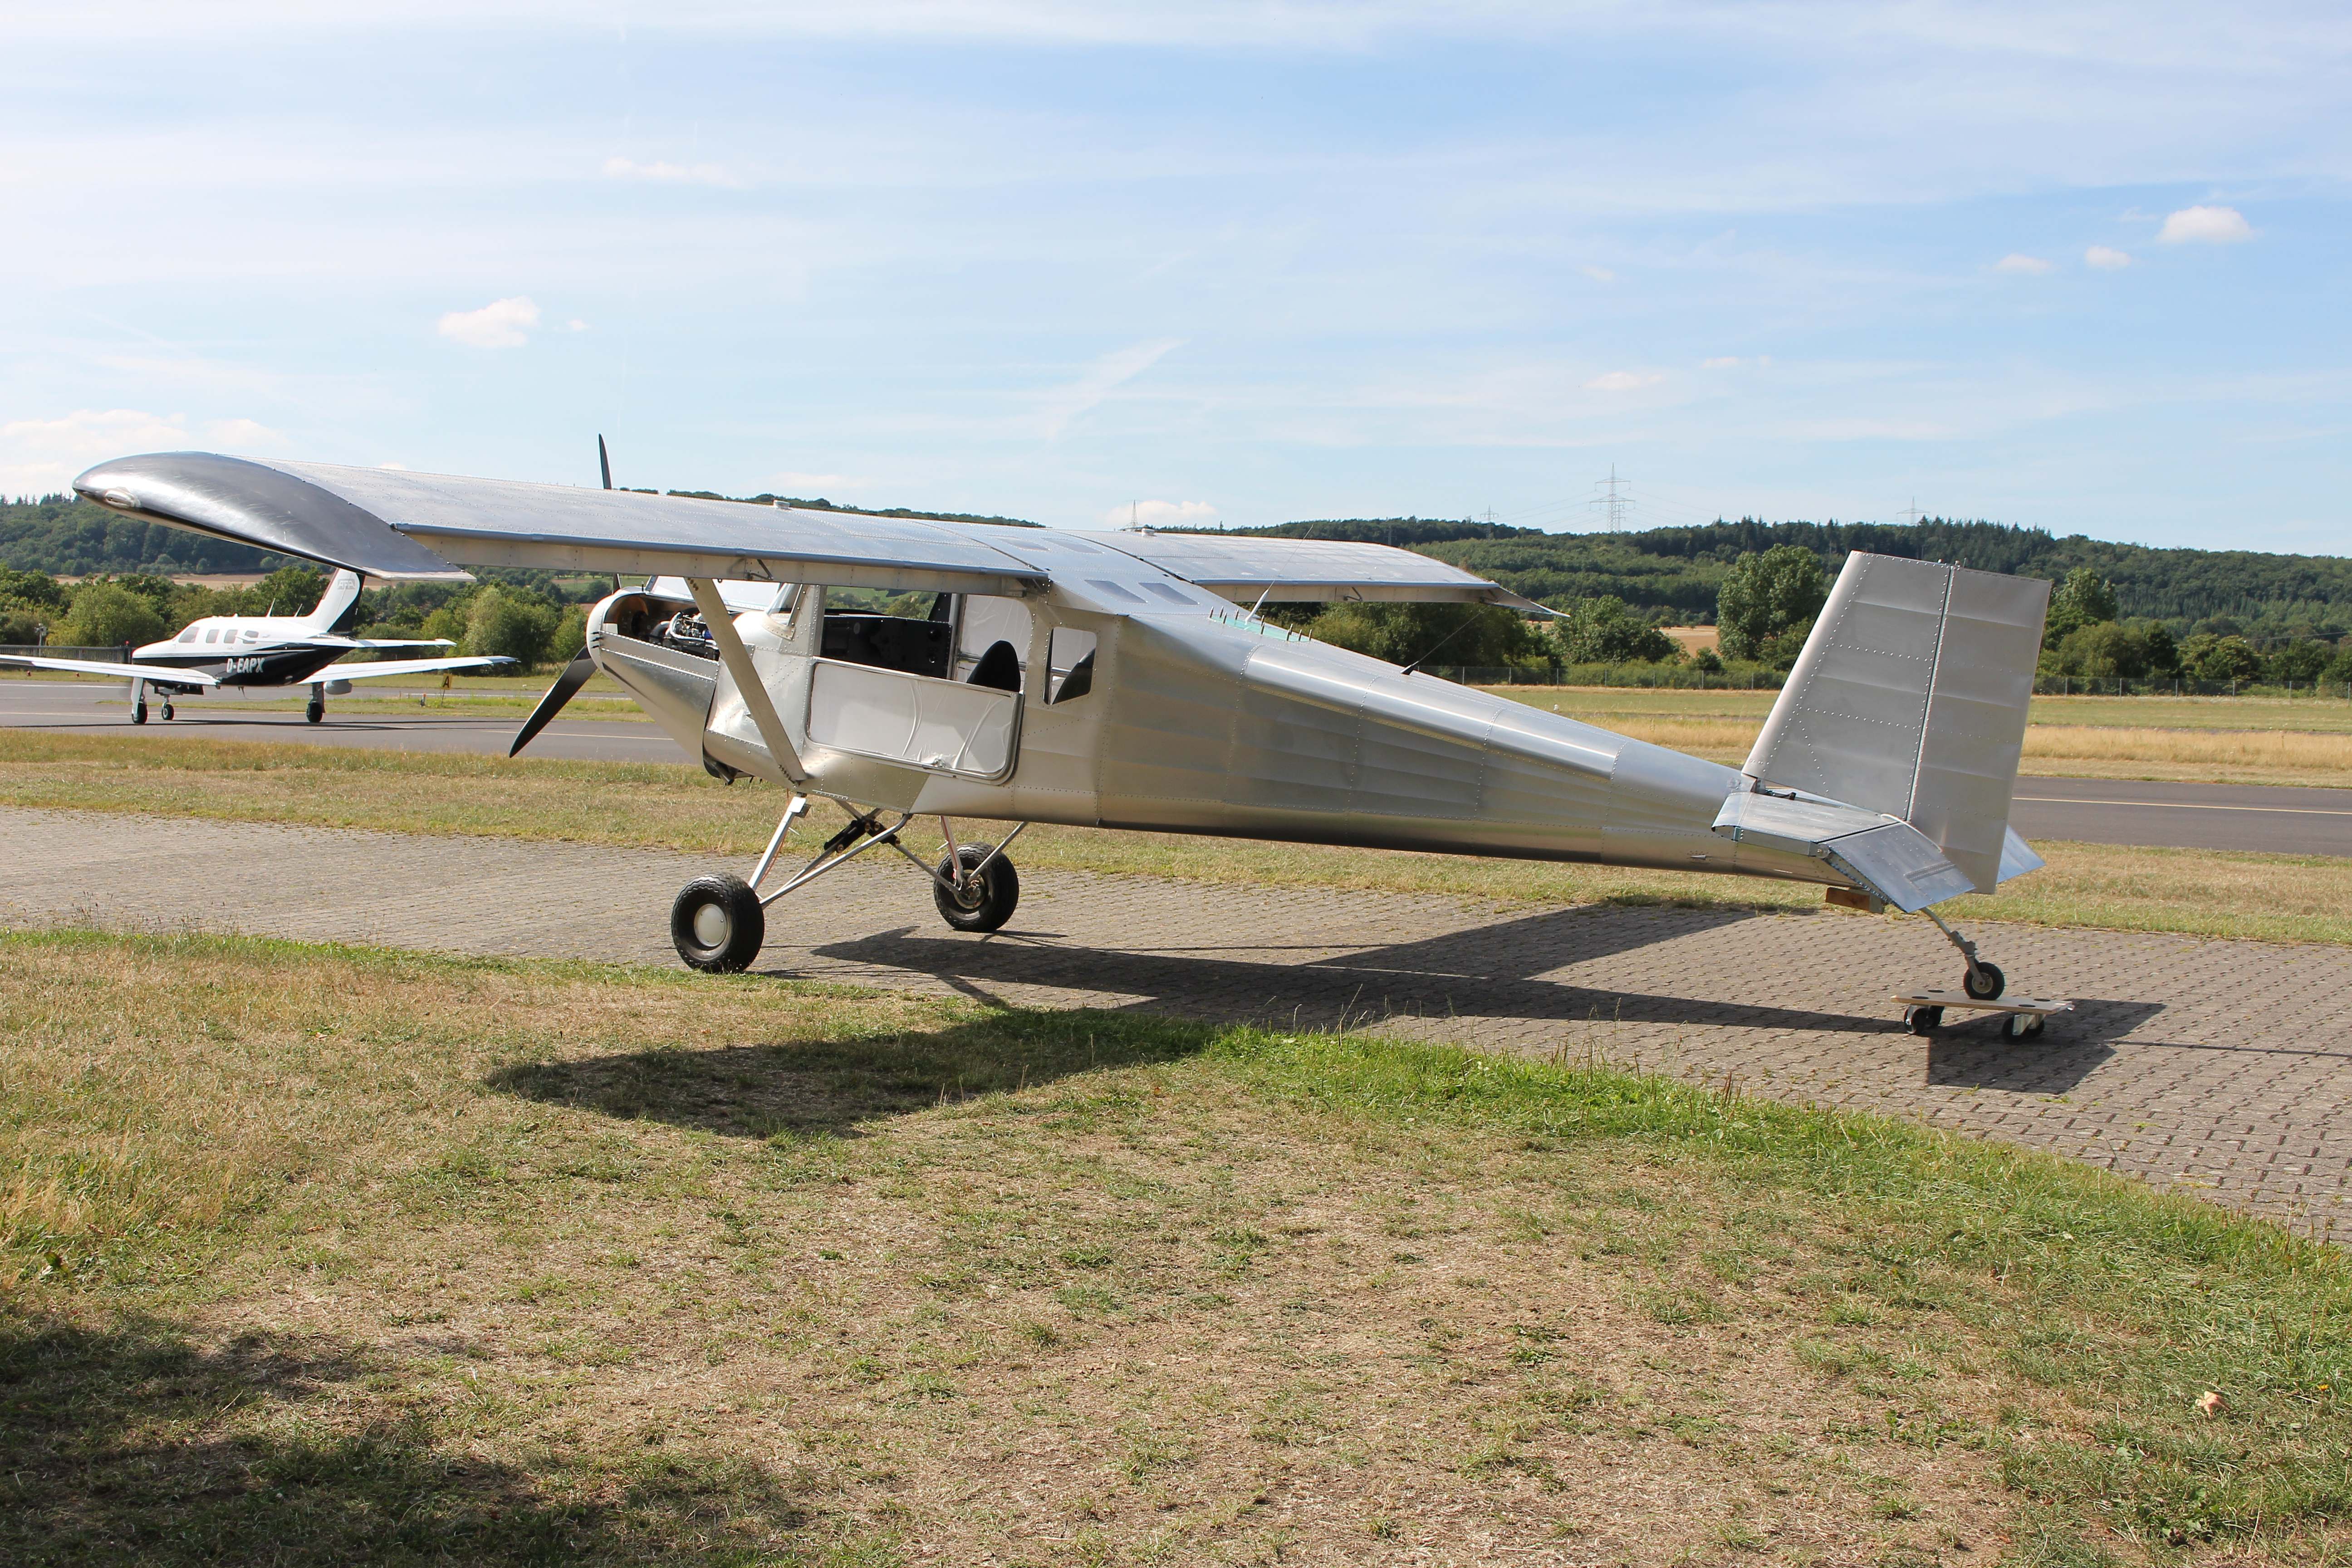
Fuselage, wings, wing tips and tail unit were put together at the airport. Now it looks like a true airplane, ready to start off in the air. But a lot …
Same trailer was used to transport the wings to the airport hangar. It was only possible to carry one wing at once. In any case it was a safe position …
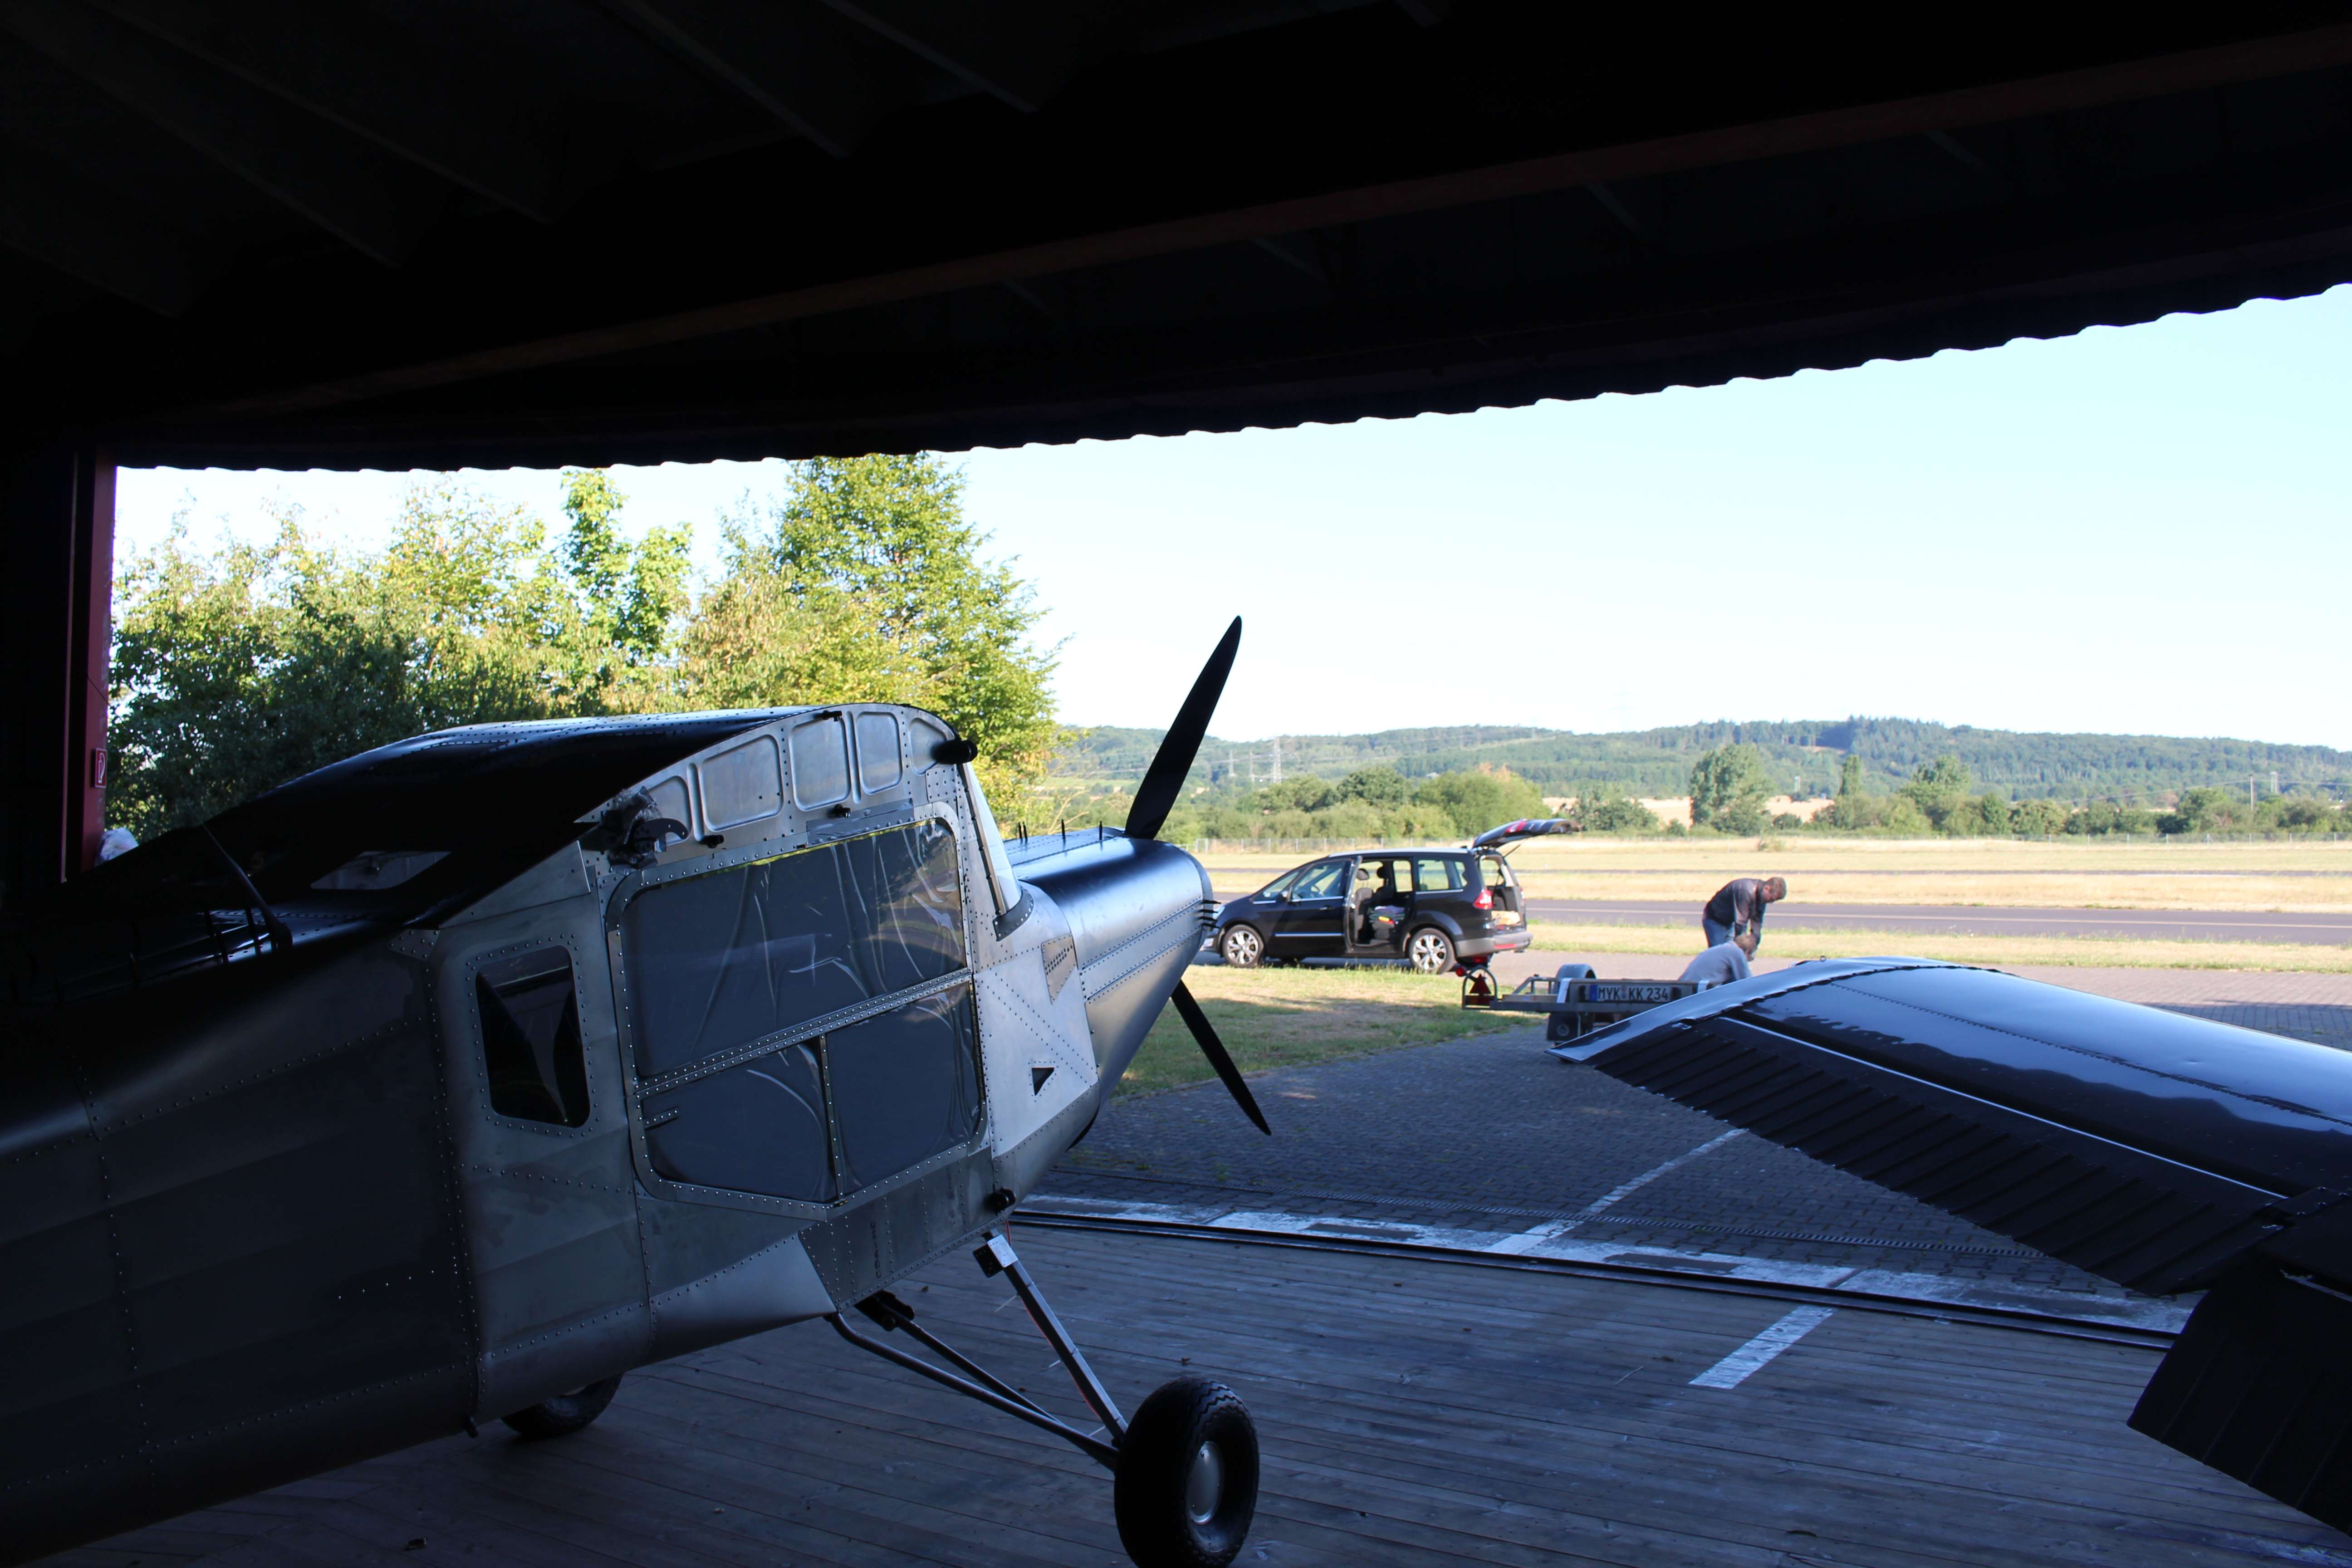
This is the new home of the airplane in the hangar at EDRK. The hangar has a rotary ground, so putting it out is easy.
Rolling off at the airport. We build a special ramp and it was an easy job rolling the fuselage down the trailer.
We had a safe arrival at the airport Koblenz (EDRK). Fuselage was absolutely stable on the trailer and didn’t move at all.
An important date today: Fuselage is transported to the airport. We could use a trailer from a member of our aeroclub. The trailer is 9 m long and really good …
Trailer is prepared for the transport. It is a big trailer, nevertheless needs some additional installations to put the wheels on. Crane was very helpful to get the fuselage on …

Before the engine even had a single minute on it, I had to do a service bulletin from Rotax. The carburator floaters had to be changed, since there were production …

Again we used the opportunity of the crane to check the amount of unusable fuel in each tank. The Rebel was put into the worst fuel conditions, which means nose …
Having a crane available in the workshop, I put the Rebel to the expected maximum positive angle of attack. So I put it into 15,5 degree positive angle …

I decided to build the carburator heat intake myself. I used a “Cessna like” design. Build from a stainless steel sheet and some stainless steel clamps. A friend welded the …
The intake at the front is also build from aluminu. Appropriate 2 1/2 inch ducting puts the air to the air cooler in the back.
Best position for the oil cooler seems to be in the back of the cowling. There is plenty of space and so I decided to put it there, build an …
Seats are ready. A local upholstery did it for us. We took care they are not too thick, cause I am very tall. Otherwise I couldn’t have an easy look …
Cowling is now near to completion. Spinner and prop are installed. I am preparing for the first engine start. But I have to move the plane first to be able …
Fuel hoses are installed. I protected them with special kevlar heat protection tube. Again bought in car tuning shops.
Water cooler is installed. I used silicone hoses. They are better than the normal ones and even cheaper. Easily to get in some car tuning shops. Furthermore the blue colour …
Cutout in the spinner are done. They now have a close fit to the propeller. Fabricating the cutouts is easy and straightforward with a Dremel tool.
To solve the propeller problem, a friend fabricated a special spacer plate for me. It is really a nice piece of art. Fabricated from aluminum on a computer CNC machine. …
Oil cooler is installed. It is installed in the back of the engine compartment. I will install a special hose to get more air into this position. Oil cooler is …
Dashboard is nearly complete now. Only transponder is missing, this will be installed just before the first flight. On the right side you can see the IPad we will use …
We acquired and installed the radio. We bought the KRT 2 model from Dittel-Avionik. Nice radio, not too expensive (compared to others). Of course ready for the upcoming 8,33 KHz …
As recommended by Rotax, we decided to install a fuel return line. This return line protects from vapor locks. It took some time to bend the appropriate 1/4 inch aluminum …
Trying to install the spinner, we experienced a problem with the propeller. The propeller already flares out in the radius of the spinner plate. We will have to figure out …
The MC-7 nose cowl has nothing appropriate for the cowling doors to sit on. So I installed an aluminum strip along the edge of the cowl. The cowling doors can …