Torque Tube with hanger
Today I partially mounted the torque tube, this is more time consuming than estimated.Working over head leaning backwards is hard, espacially when the temperatures are more than 35 degree Celsius …
Building our airplane
Today I partially mounted the torque tube, this is more time consuming than estimated.Working over head leaning backwards is hard, espacially when the temperatures are more than 35 degree Celsius …
Today we moved out the Fuselage. This is the first time the Rebel can see the sky. It looks good in the shiny sun.
I did the fuselage exit hole for the elevator push pull tubes this weekend. This was a tedious work. Filing and filing the hole until I get the …
This is the first (and probably only) time where normal rivets are used on the Rebel. It was really fun to hammer these down. But nevertheless I am …
A proposed by experienced builders on the murphy builder list, we tapped the holes into the fuselage bottom. AN3 screws will replace the rivets. In this way I can …
This is the place, where the mixer arm will be installed to. I decided to put the green aluminum onto the side. Not required but seems good for the …
After some sanding, here is the final mixer arm, ready for installation.
The mixer arm has to be fabricated out of a aluminum bar. This is definitely the point where you need a good band saw. Mine is not the best. …
To minimize friction at the control column, I removed the black color. I think pure metal will have less friction in the lexan base than the black coating.
The delrin blocks in the bearing base were to tight. I had to sand them to allow a good fit of the control column. I used a tube of …
After some consideration, I decided to put inspection holes into the fuselage bottom. Thus the AN5 bolts in the carrythroughs may be accessed from outside. Just in case I …
The winter is getting pretty cold at this weekend. Unfortunately this forces us to a break. Temperatures below -10 ° Celsius make it nearly impossible to work in …
One of the latest step in the fuselage building process are the seatbelt attach brackets. A 3 point seatbelt will be fastened here.
This will be the last step at the fuselage for some time. The bottom remains clecoed, so that landing gear can be installed. Landing gear and controls will come …
This detail show one seat rail as well as the locking mechanism for the seats.
Gussets to support the connection from the cabin to the tailcone. Nice parts, fabricated by my own from 0.032.
For a better visibility we decided to install all windows. The doubler is self made from 0.040. The Lexan windows are sealed with “Würth Scheibendicht abtupfbar”. Sealing works great …
Instead of turning around the fuselage, we decided to rivet it from “down under”. We put it on some sawhorses and then had a good training session with long …
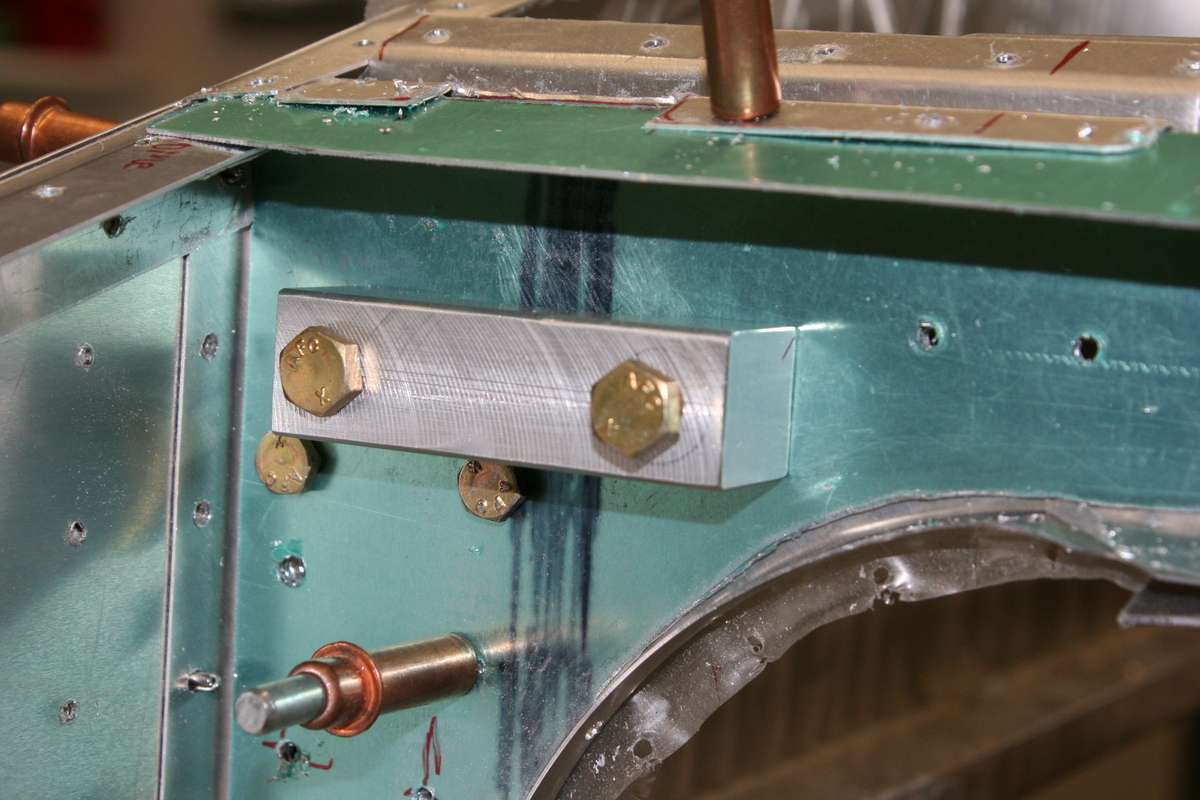
This is a detailed photo of one of the fixing points for the parachute. Every point has to be able to withstand a force of 5G.The upper bolts will …
We had to move into our garage at this time to do the final riveting of the tailcone. Finalizing in the basement would not be a good idea, we …
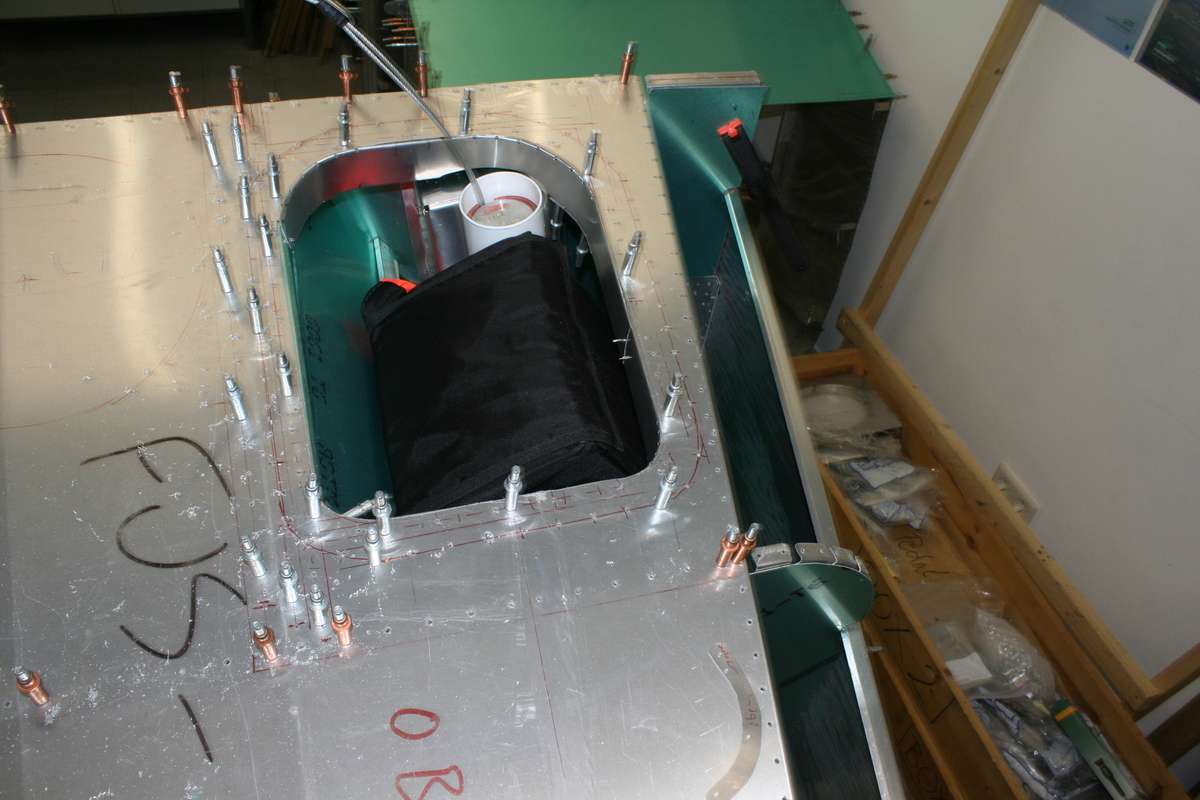
The photo shows the recovery system as seen from above. The hole in the tailcone will later be covered by a 0.020 Aluminum plate. Due to the hole …

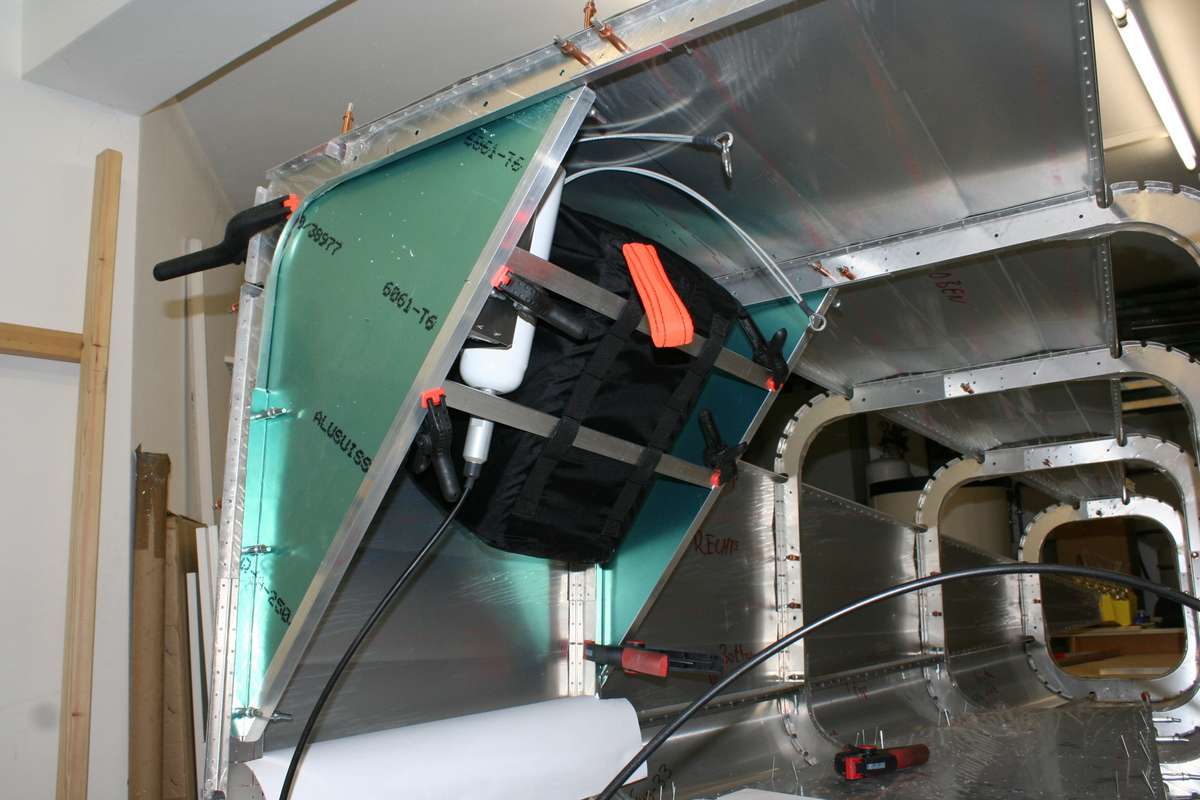
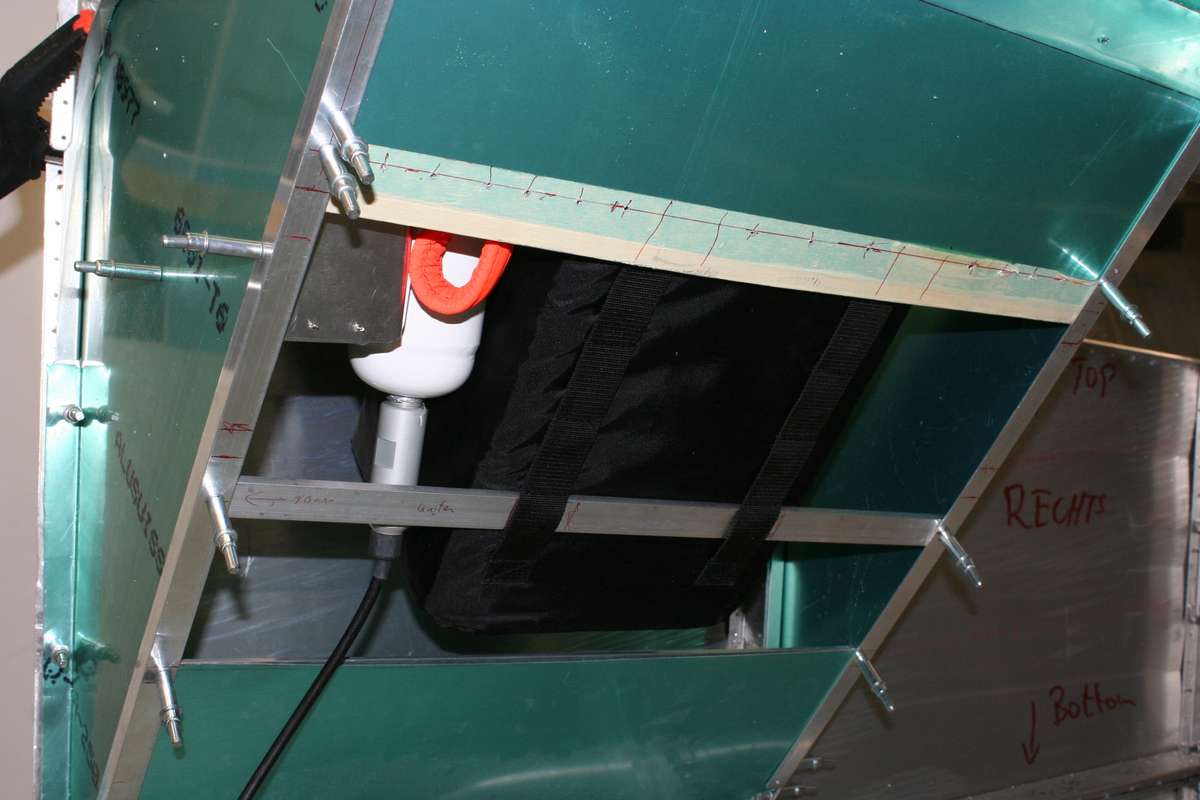
For safety reasons we decided to install a ballistic recovery system. This picture shows our own construction how to fix it in the tailcone. The white cylinder is the …
Although not required in the manual. I decided to fabricate this doubler to prohibit the “eyebrows” (front top window) from cracking. I used 0.040 Aluminum, probably a bit oversized, but …