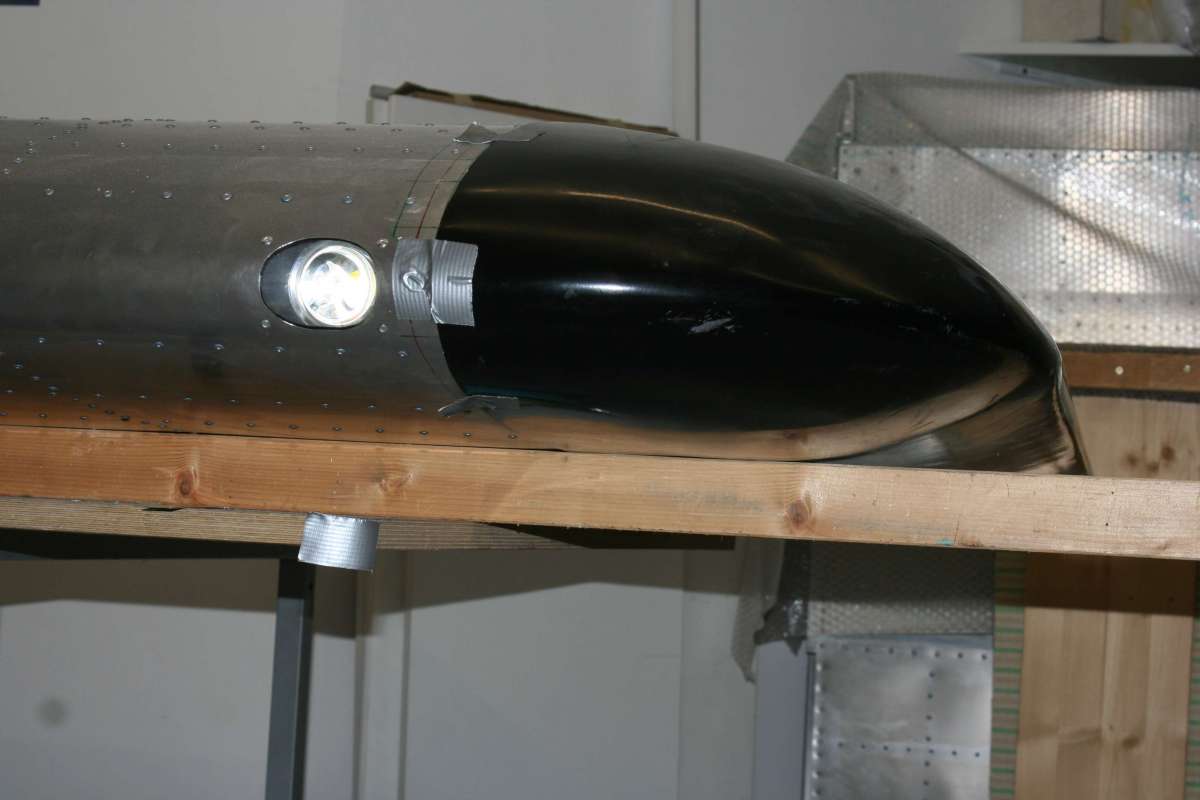
I installed a second landing light at the left wing. The picture shows the finalized installation at the end of the wing, just in front of the wing tips.
The next pictures show the fabrication of the lights.
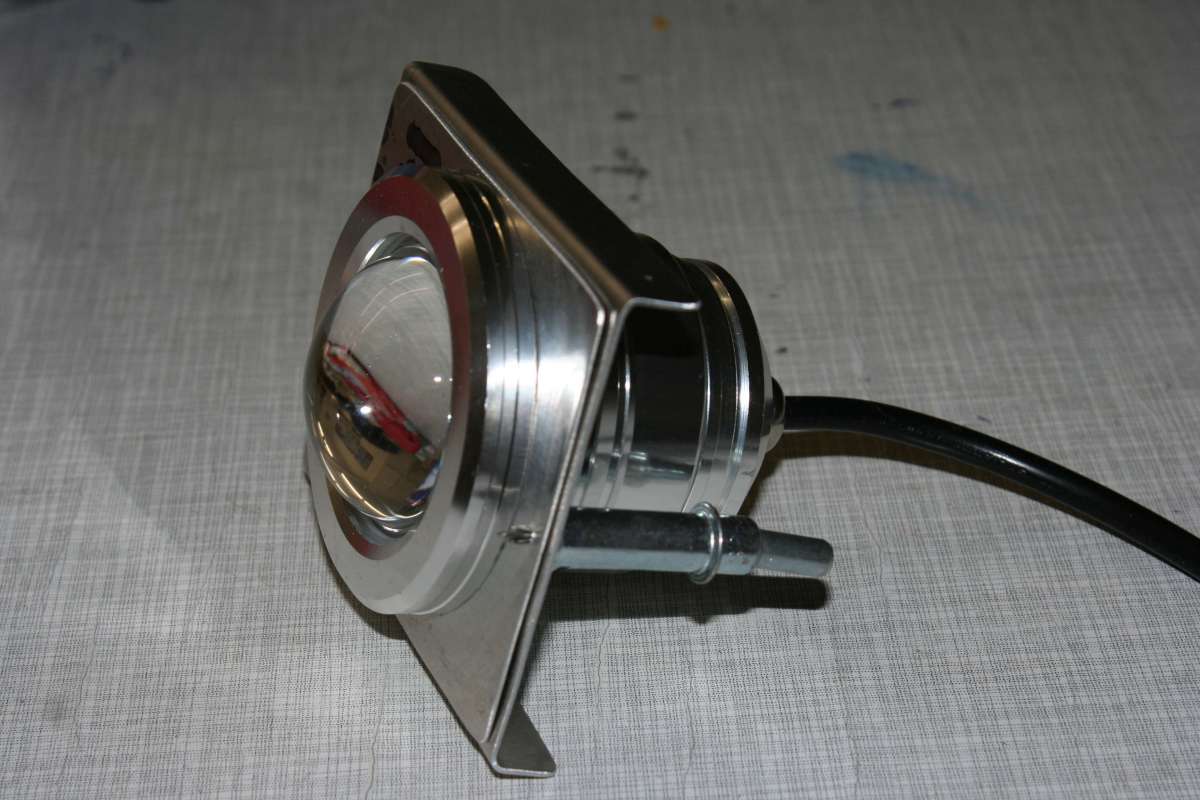
First step of the installation: The front of the Led Light is unscrewed. Two aluminum sheets with an appropriate hole are inserted and the fixed with the front part of the light.
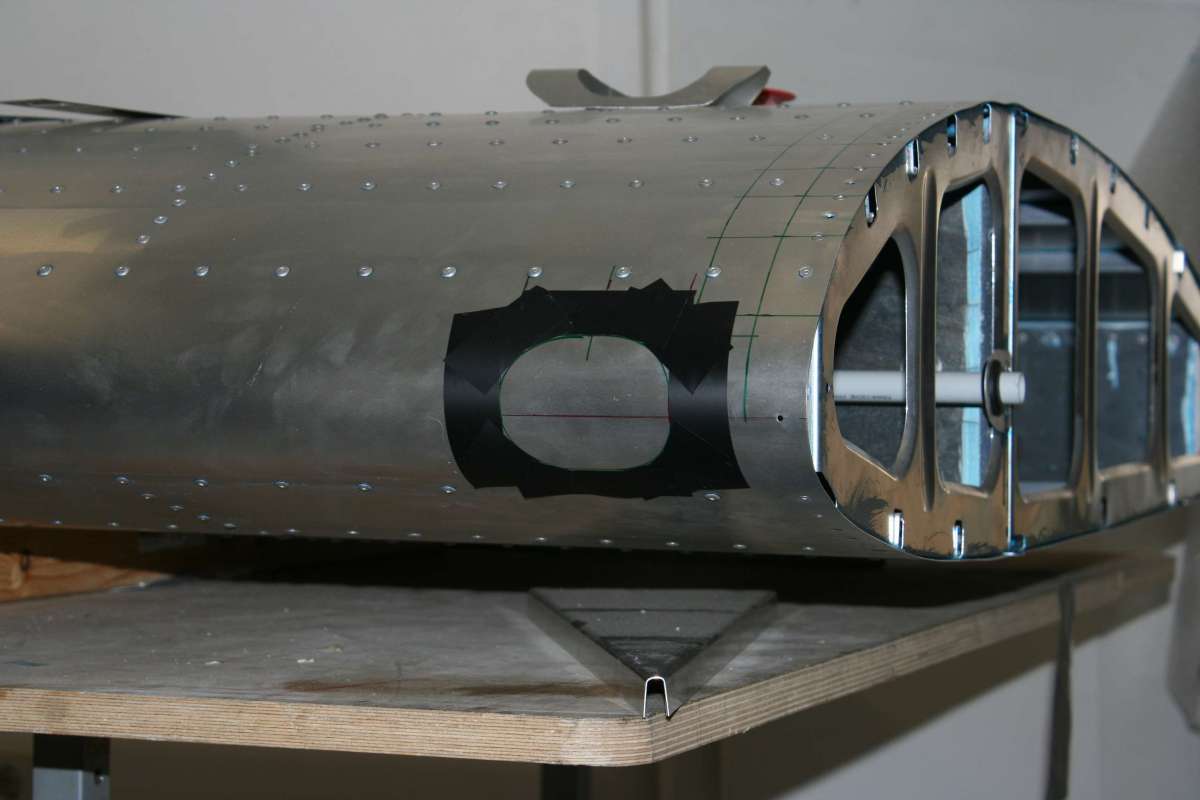
Preparation of the hole in the leading edge of the wing skin. The led lights I used only need a small opening in the wing skin. Nevertheless the light is distributed at an 40 degree angle.
Next step is to cut a hole into the front spar. The opening size is 57 mm. As usual when using the hole saw, I used a piece of wood to fix the saw.
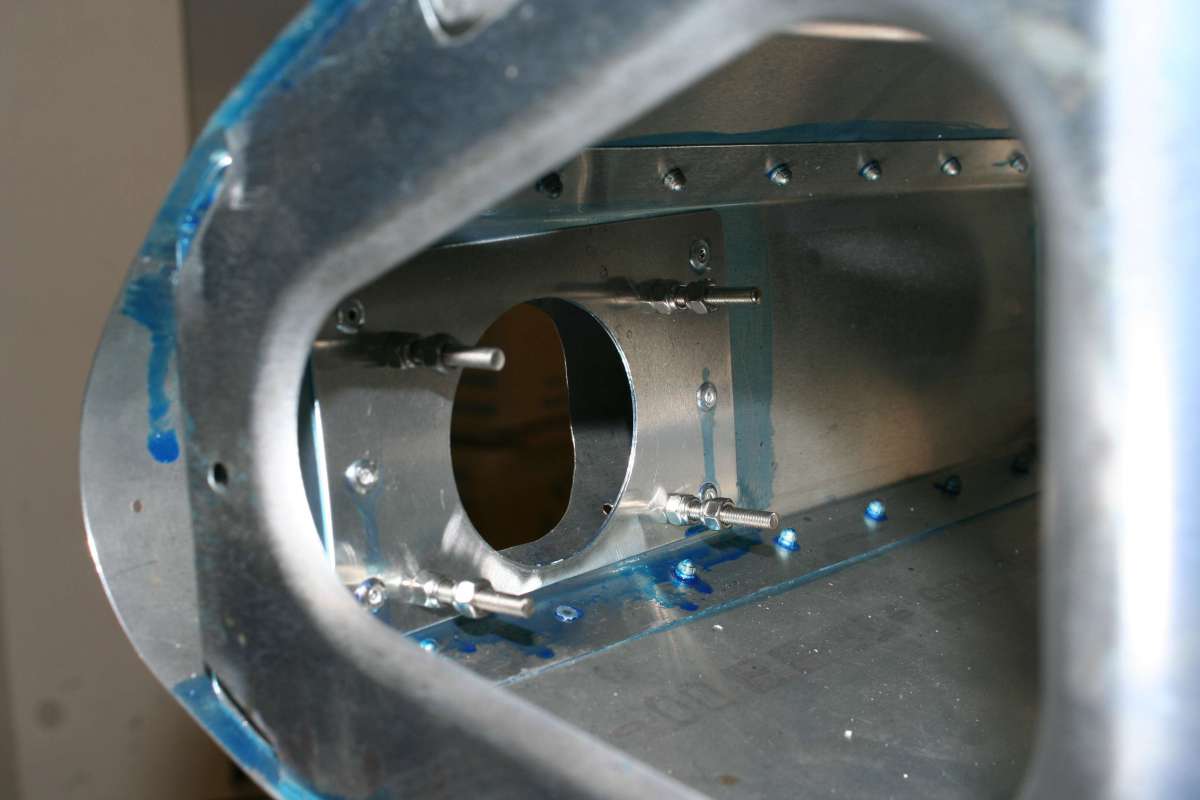
Although near the end of the wing I used a doubler to reinforce the front spar hole.
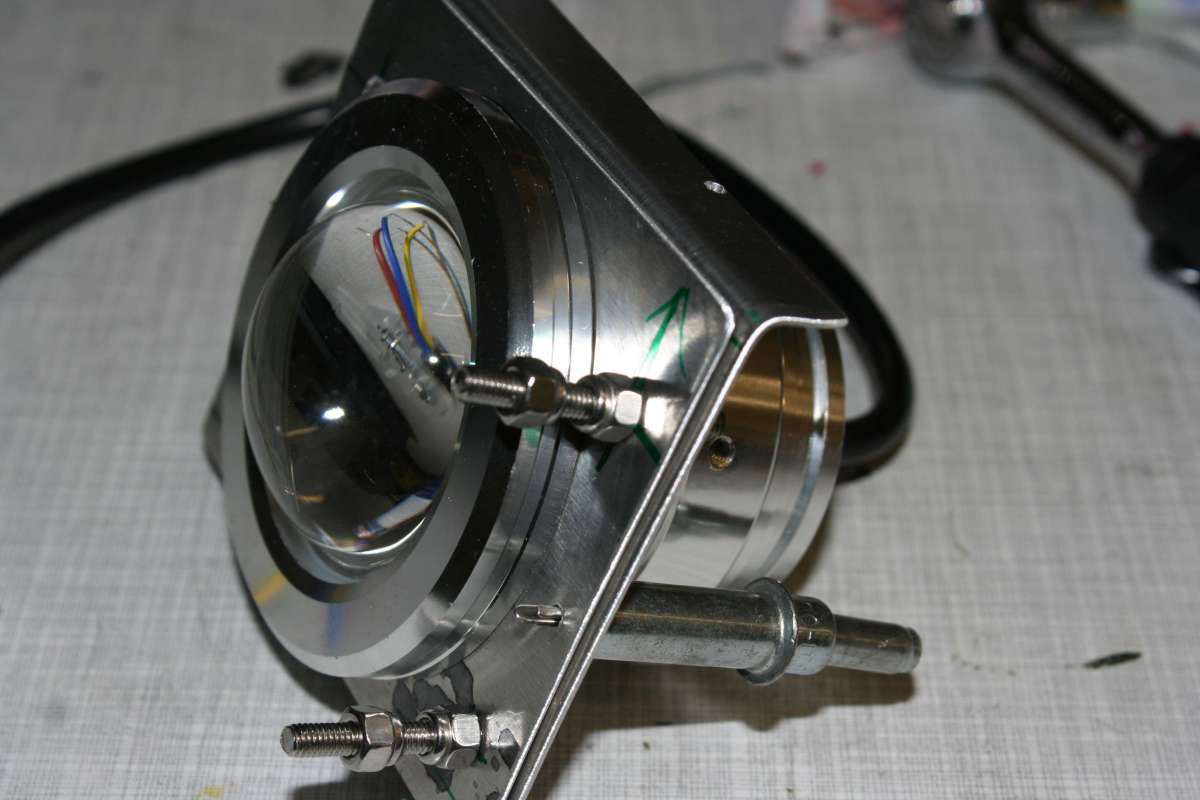
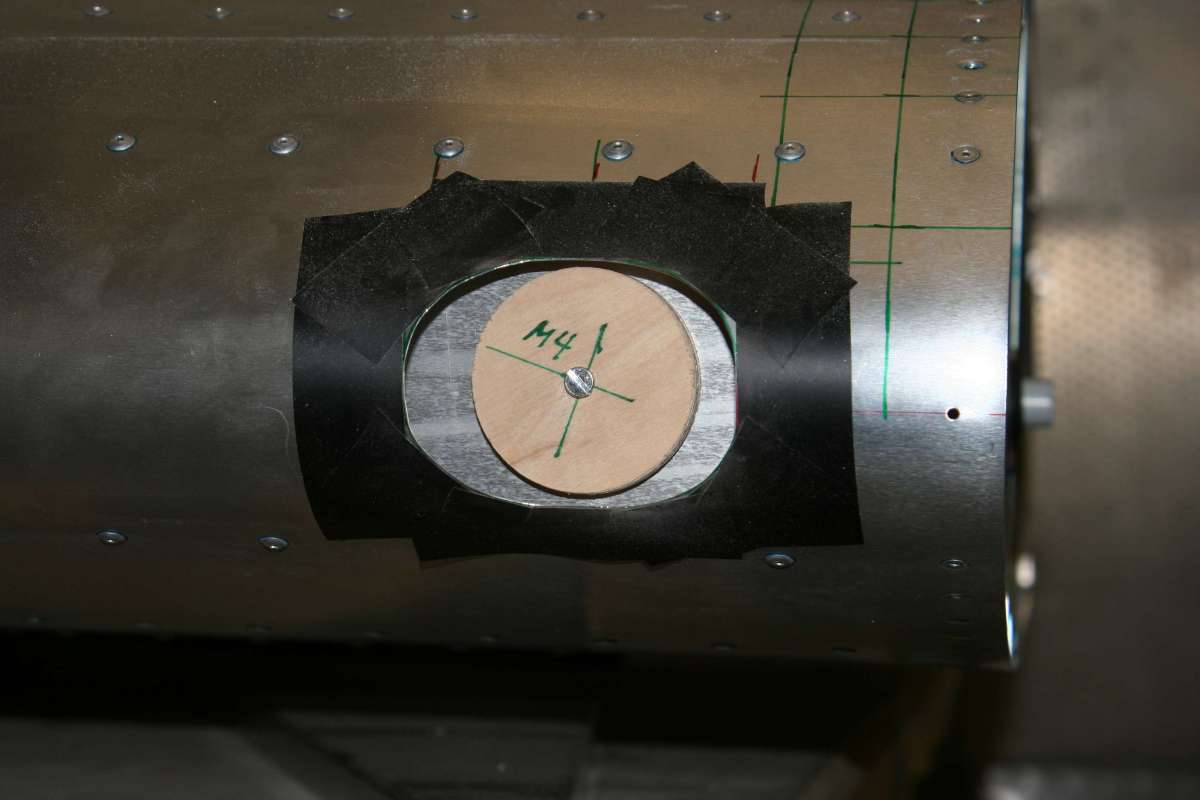
Stainless steel screws (M4) are used to fix the led installation brackets at the front spar.

Plexiglas front is bent at 170 degree in the pizza oven. Oversize holes are cut in the plexi. To fix the plexi aluminum holders are placed behind the plexiglas.

The plexi is fixed with 4 rivets. The opening is glued and sealed with Sikaflex 295UV, the same stuff I also used to installed the windshield.
Done ….